How to Make a Custom Quilt Label
Add a personal touch to your quilts with a handmade label that’s as meaningful as the quilt itself. It’s a small space where you can leave a piece of your heart… a date, a name, a tiny message for a loved one, or a simple reminder of why you made the quilt in the first place. Whether your quilt is a gift, a memory keeper, or a cozy companion for slow mornings, a custom label turns it into a story that can be treasured for years to come.

This post may contain affiliate links, which means I may earn a small commission if you make a purchase through them, at no extra cost to you.
Thank you for supporting Thai Charm and helping me continue to share free tutorials and inspiration with you!
Materials & Tools I Used
Here’s what I used to make this colorful puff bag. Feel free to swap in what you have or use these links if you’re gathering supplies for your own puff project:
Fabric:
🌿 Fabric for your label (solid or low-volume print), I used Riley Blake Texture in Cloud and Bluegrass Charm
Thread:
💛 Aurifil Indelible by Anna Maria Textiles
💛 Aurifil Evolve by Suzy Quilts
Tools & Notions:
✂️ Basic Sewing Supplies
🧵 Ipad or Tablet to draw digitally (optional) & Printer
🧵 Sewline Air-Erasable Fabric pen to draw directly on the fabric (optional)
🪡 Hand sewing needle for tying puffs (I used my Sashiko needle)
✂️ Sulky Sticky Fabri-Solvy Stabilizer

Step 1 : Create your design
Before you begin, think about what you want this label to capture. For my Porch Swing Quilt, I wanted the label to reflect the memories stitched into each seam and the quiet moments shared while making it, so that every time my daughters use this quilt, they’ll remember how deeply they are loved.
Sketch your label design by hand on paper or digitally in Procreate, keeping it simple. Include your name, the quilt name, the date, and a small motif like a heart or flower that ties back to your quilt’s story. This small square/rectangle of fabric becomes a gentle reminder of why you made the quilt and the love that went into every stitch. Once you’re happy with your design, print it onto Sulky Printable Sticky Fabri-Solvy following the package instructions.

Step 2 : apply & stitch
Cut your label fabric a few inches larger on all sides than your final label size to give yourself plenty of room for hooping and stitching. For example, I’m using my 6" hoop for this Porch Swing Quilt label, so I cut my fabric to about 8" square to give me enough room to comfortably attach it to the hoop.
Peel the backing off the Fabri-Solvy and carefully stick it onto the center of your fabric, smoothing it out so there are no bubbles. Now you’re ready to add your stitches with ease and intention. Thread your Aurifil 8wt thread onto your needle and begin stitching your design. Use a simple backstitch for lettering, adding small details like French knots or lazy daisy stitches for extra charm.
Take your time and enjoy the slow stitching process.

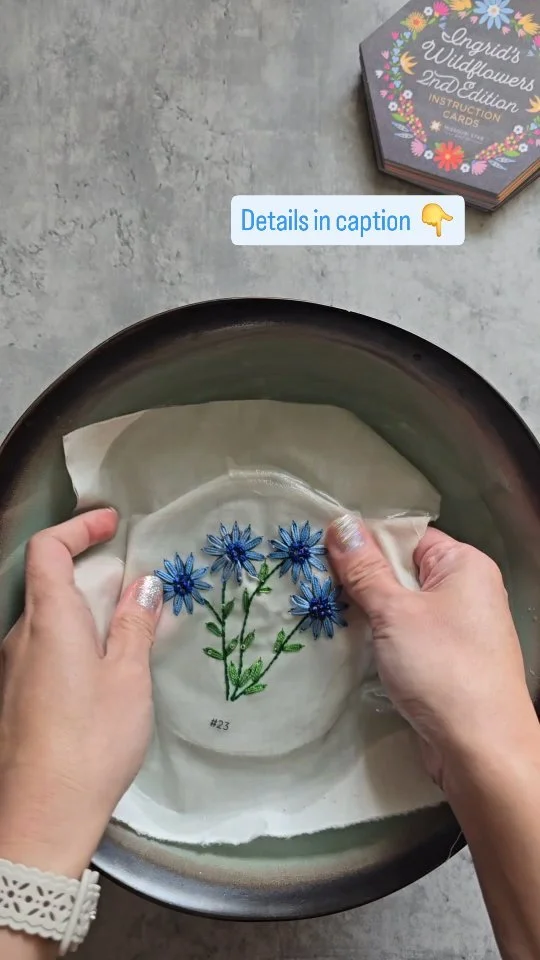
Step 3: Rinse and TRIM to size
Once your stitching is complete, rinse your label under cool water to dissolve the Fabri-Solvy, watching your stitches come to life on the fabric. Let it dry flat, gently pressing it into shape with your hands.
Press your label with a warm iron to remove any wrinkles. At this stage, trim your label to your desired size.
For this Porch Swing Quilt label, I decided to add a 1" fabric strip around the edge to frame it up before attaching it to the quilt. It adds a soft, finished touch and connects the label to the quilt’s fabrics in a simple, sweet way.


Adding framing strips (optional)
If you’d like to give your label a sweet, framed finish, adding fabric strips is a simple way to tie your label back to your quilt’s fabrics. I trimmed my Porch Swing Quilt label to 4" x 6" and cut (2) 1" x 4" strips (top & bottom), and (2) 1" x 7" strips (sides).
I stitched the strips around the edges of the label first, creating a simple frame. Once all the strips were attached, I folded the edges under about ¼" and pressed. For the corners, I folded a small triangle at each corner before folding the sides under. This helps the corners lay flat and tidy without extra bulk while keeping a clean finish. This small step adds a cozy, patchwork feel to your label while giving it a clean, finished look before attaching it to your quilt.
step 4 : Attach the Label to Your Quilt
Hand stitch or machine stitch your label to the back of your quilt in a bottom corner, or add it to the quilt top before quilting if you prefer it as part of the quilt’s design.
Your quilt now carries your signature in a beautiful, personal way, connecting it to your quilt’s story while adding a professional finish to your work.Adding a handmade label is the final stitch of love on your quilt. Whether it’s for your Porch Swing Quilt or your next project, it’s a small way to capture the heart behind every quilt you make…. one that will be felt every time it’s used.
What do you think? Do you usually add quilt labels to your quilts? If you haven’t tried it yet, I hope this tutorial inspires you to give it a try. I’d love to see your finished labels—Be sure to tag me @ThaiCharmllc so I can cheer you on!
Happy sewing,
Sandy
you might’ve seen this one on the ’gram!