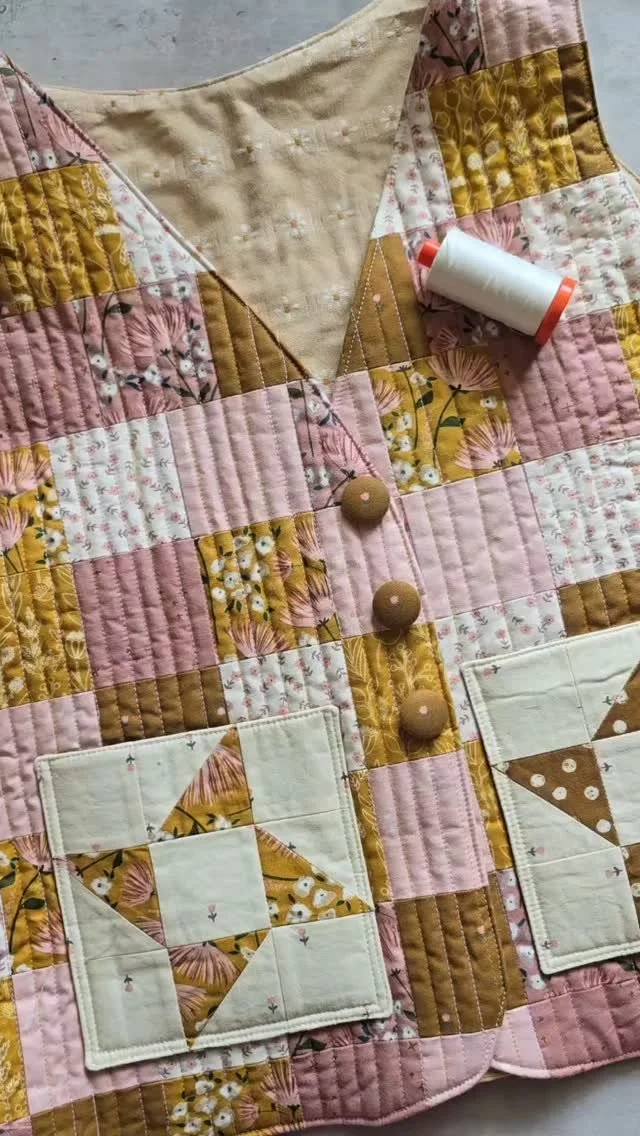
Turning a Quilt Block into a Dress - Wayfinder Block Tutorial
Sometimes a quilt block leads you somewhere unexpected
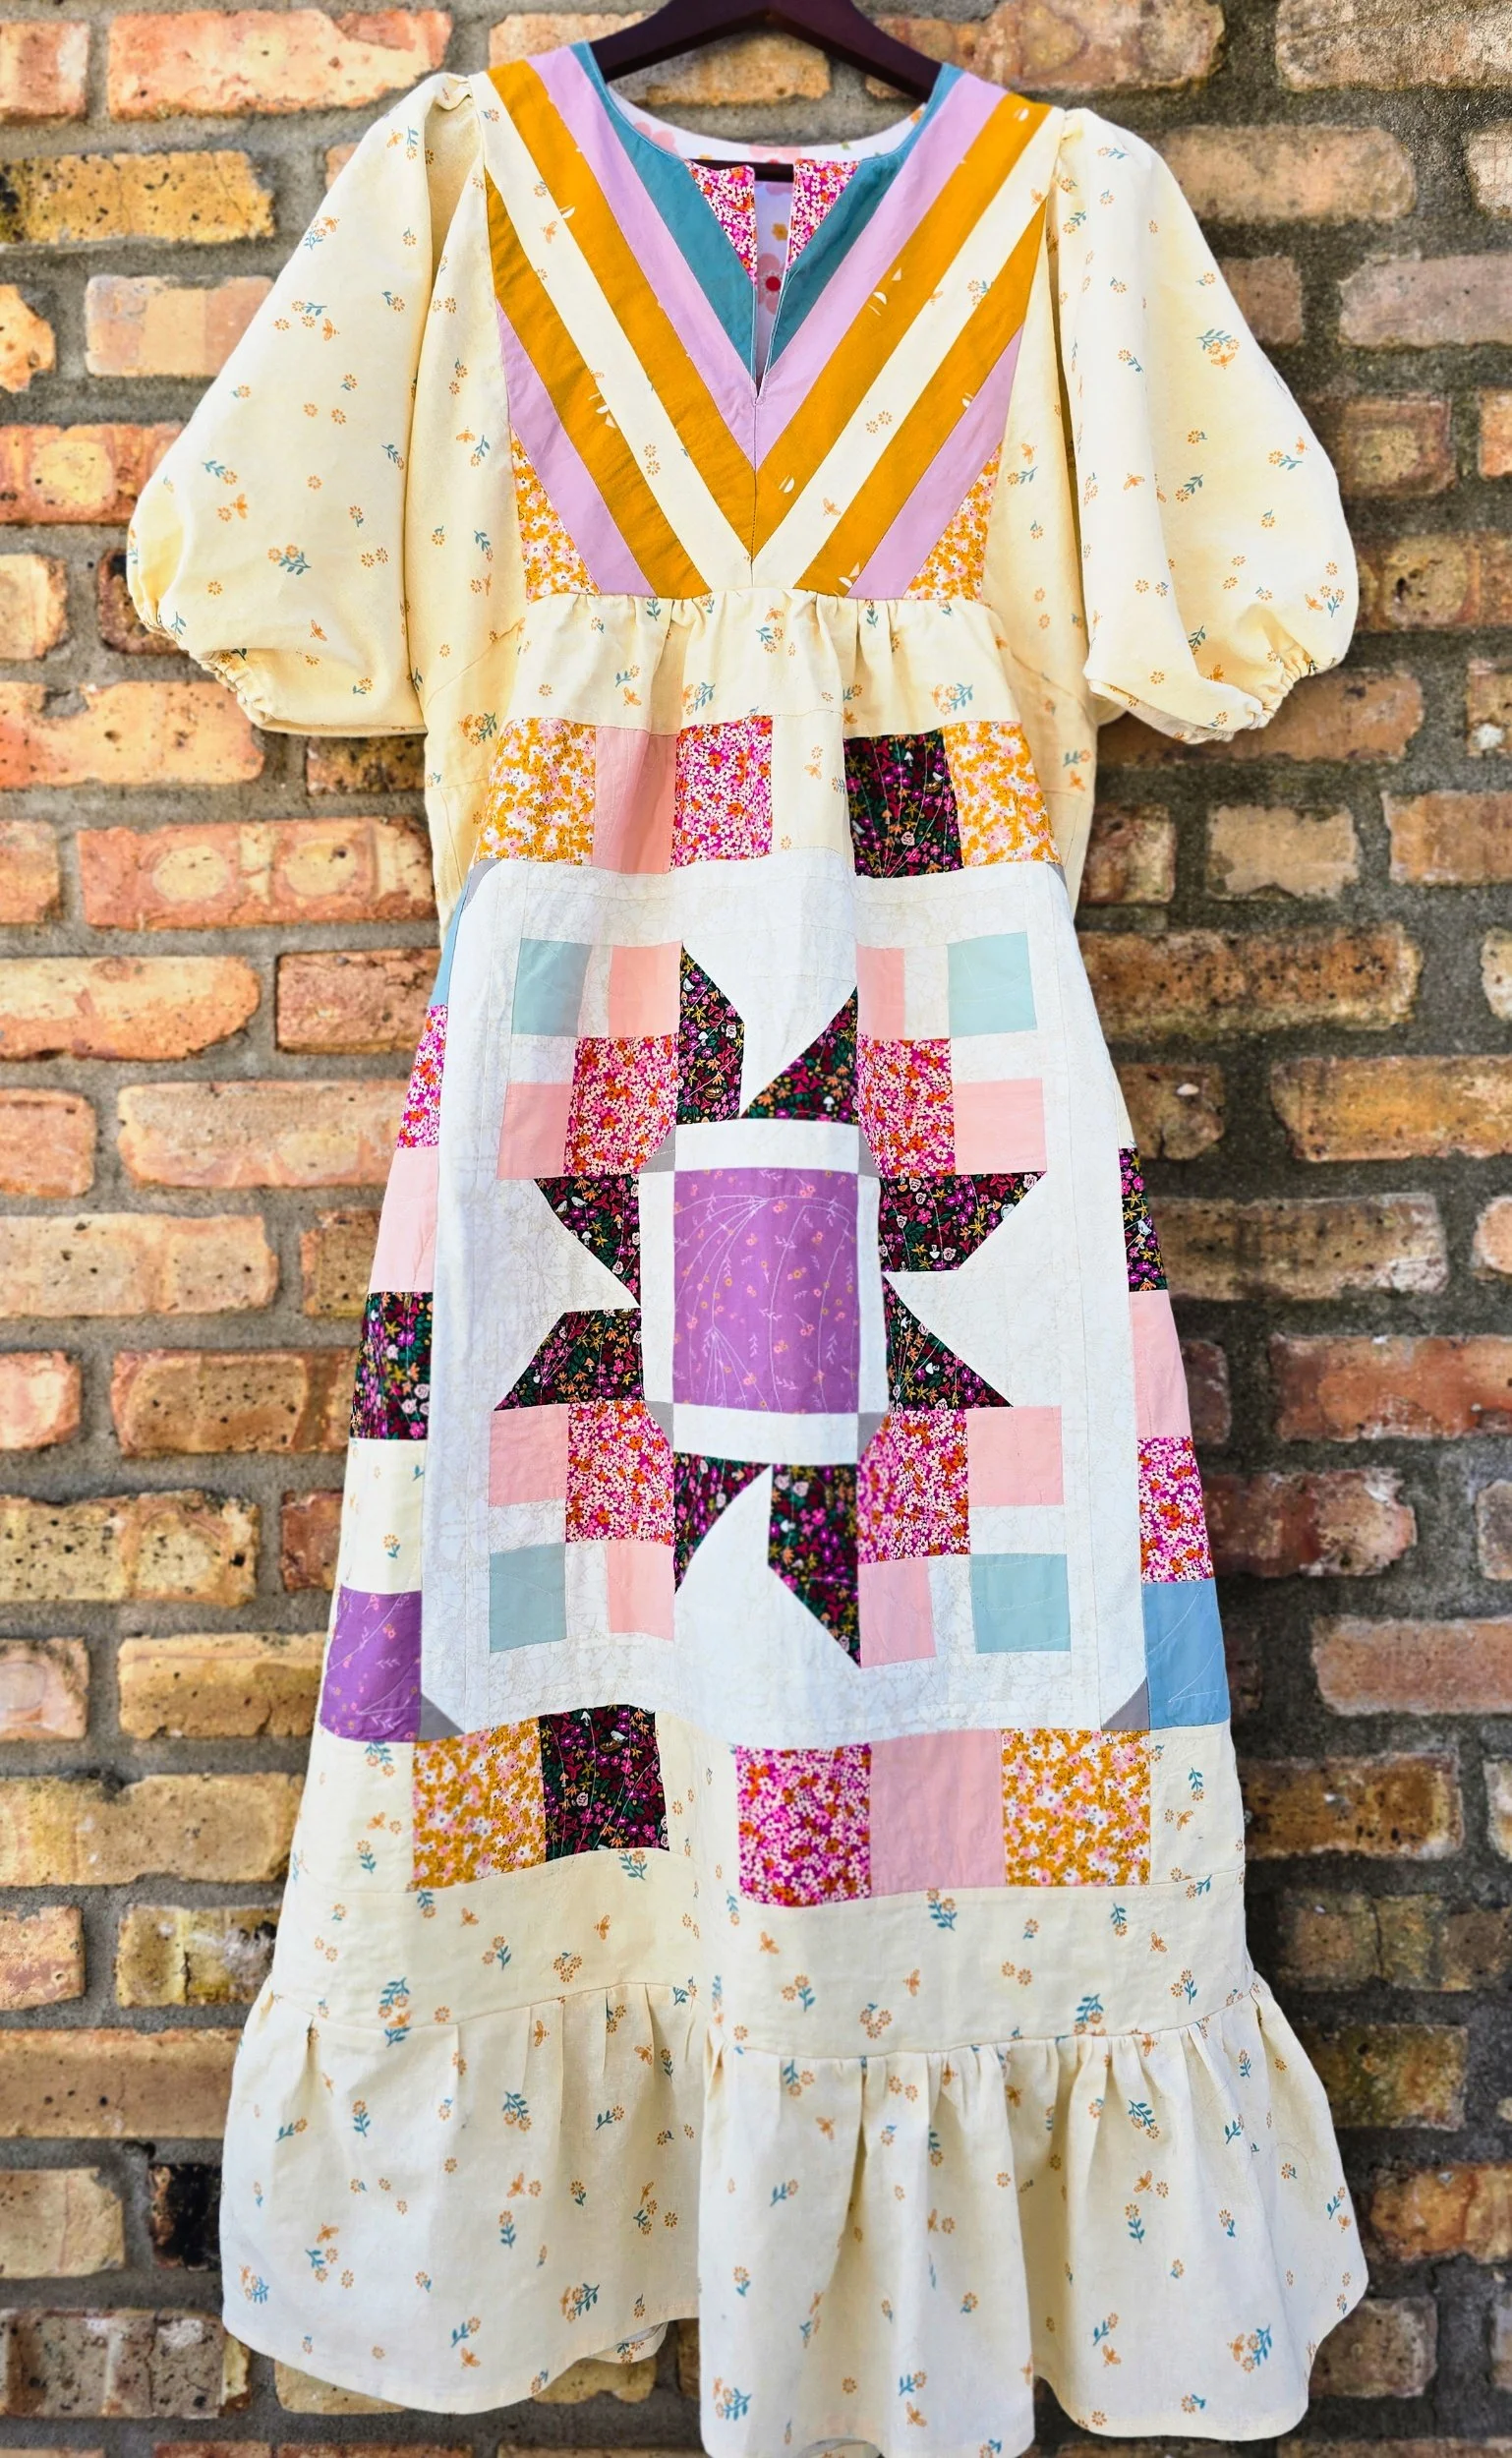
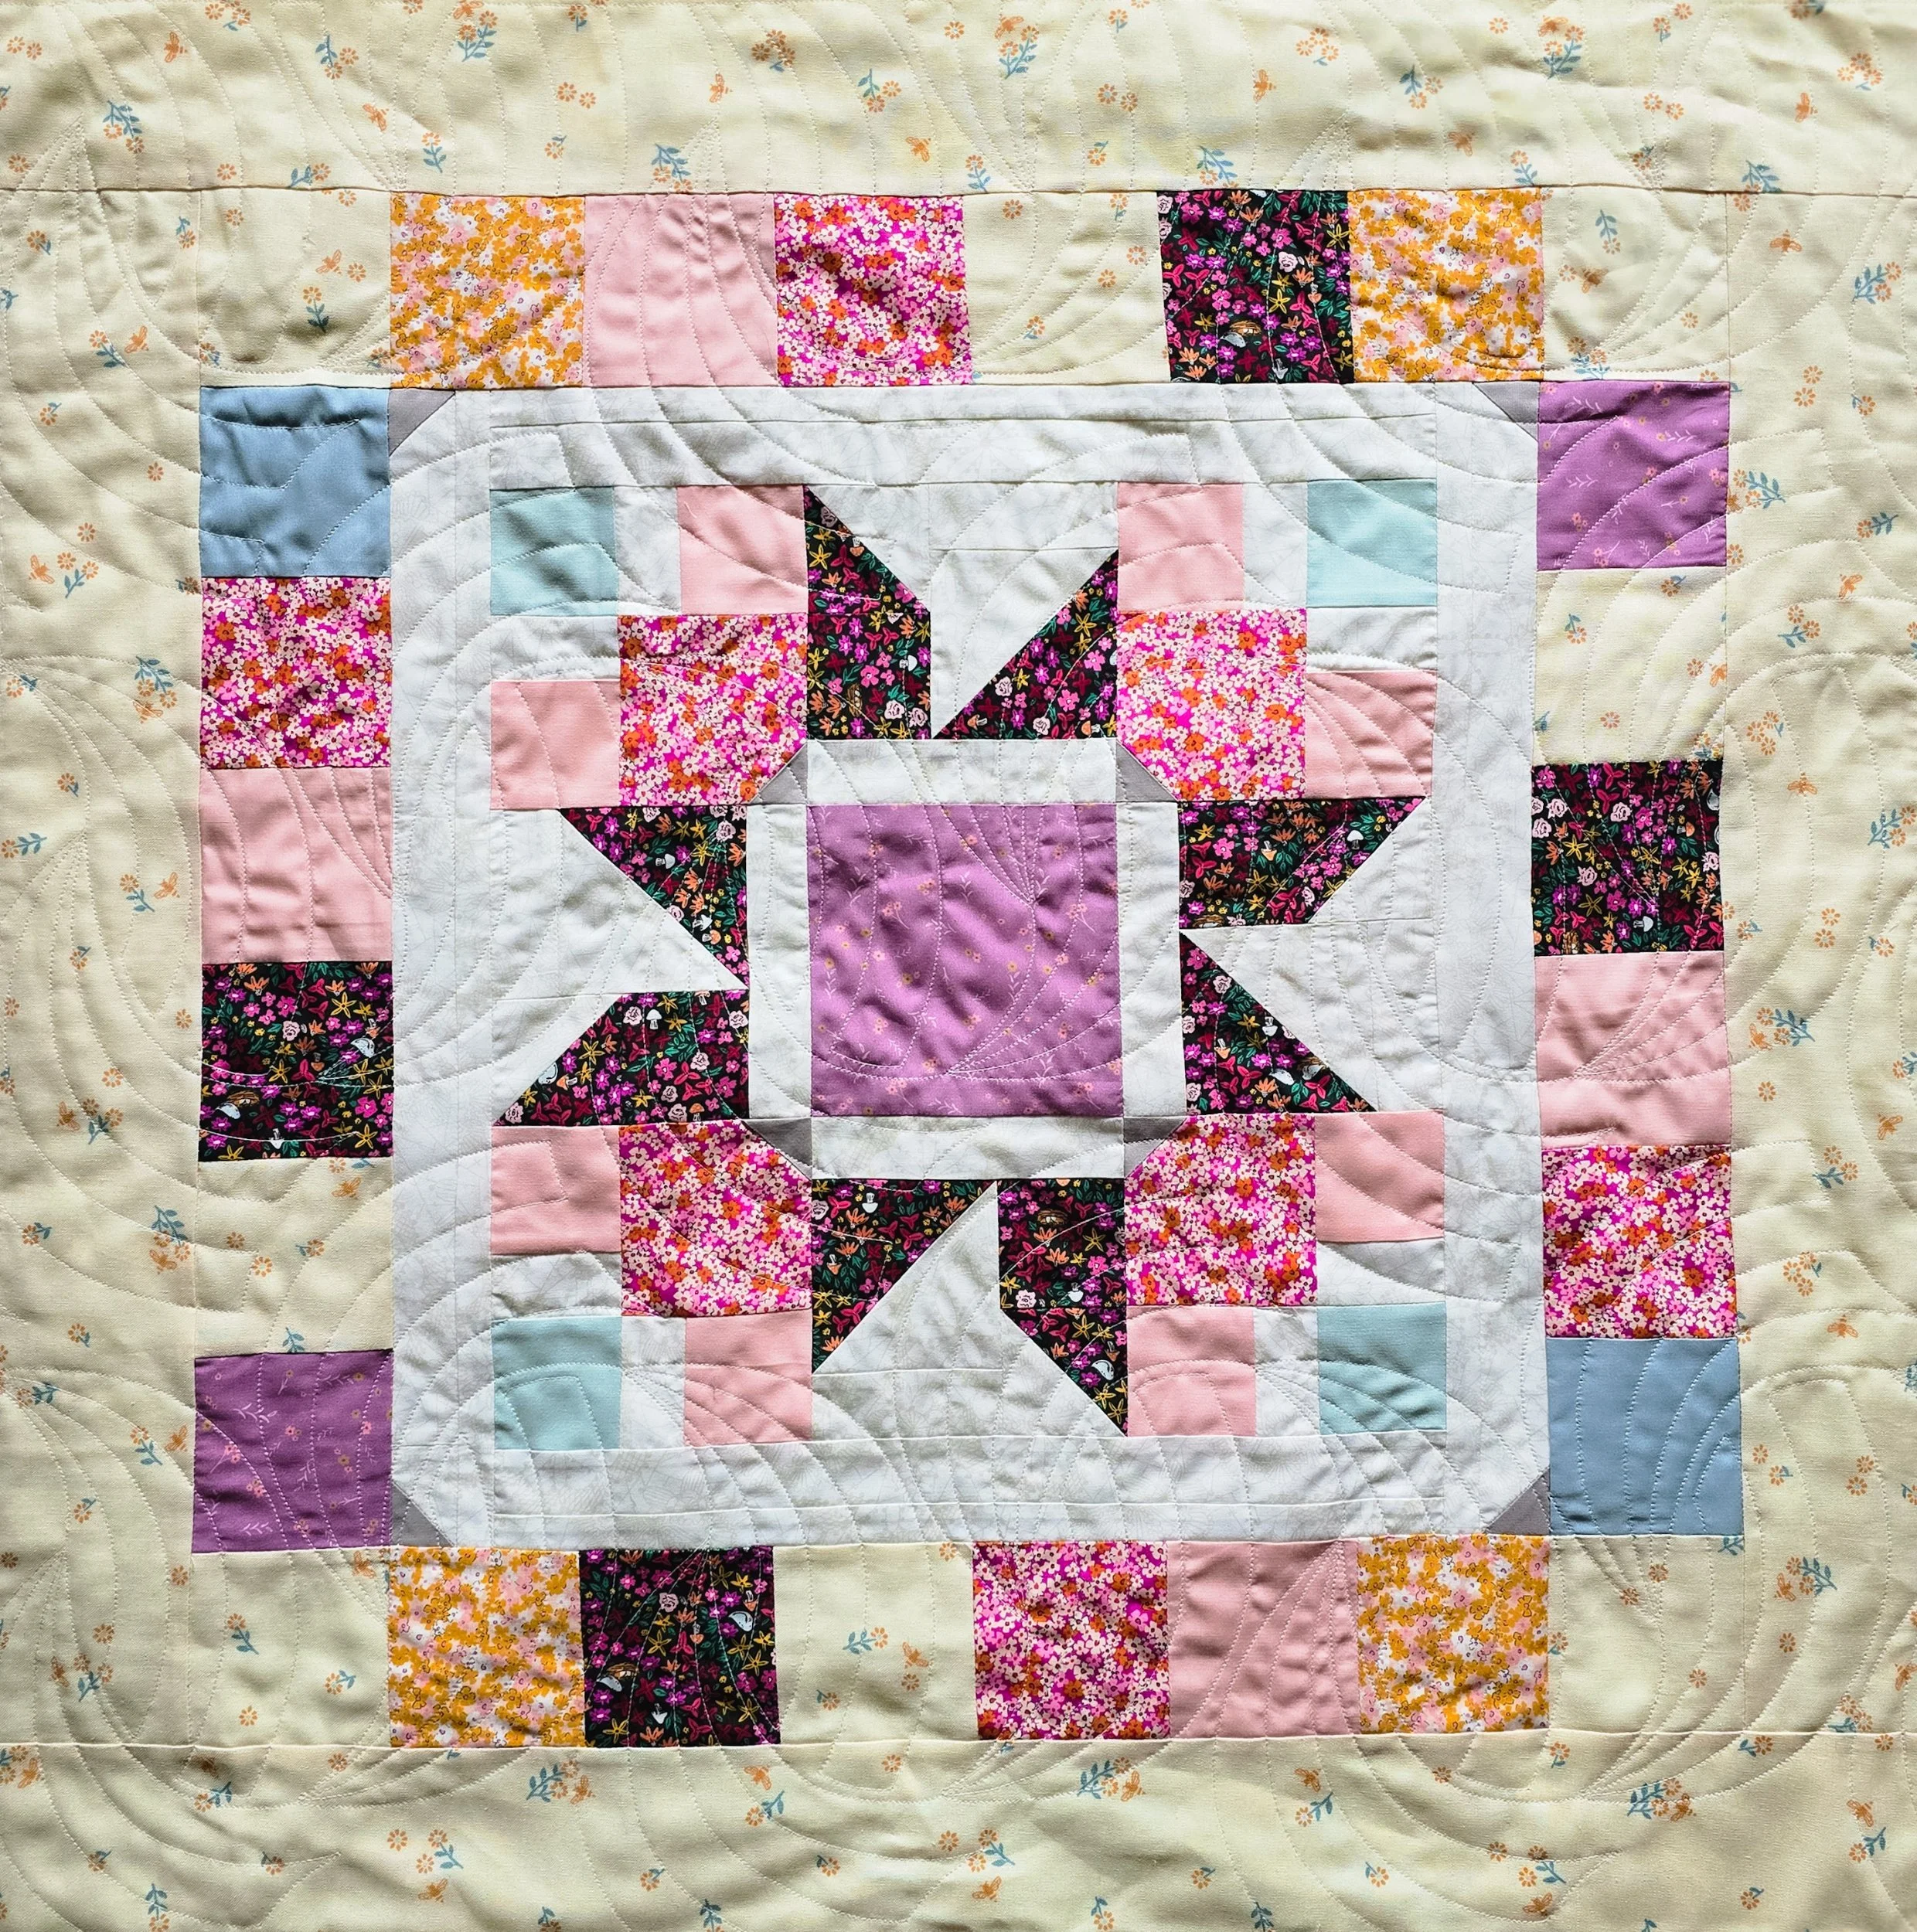
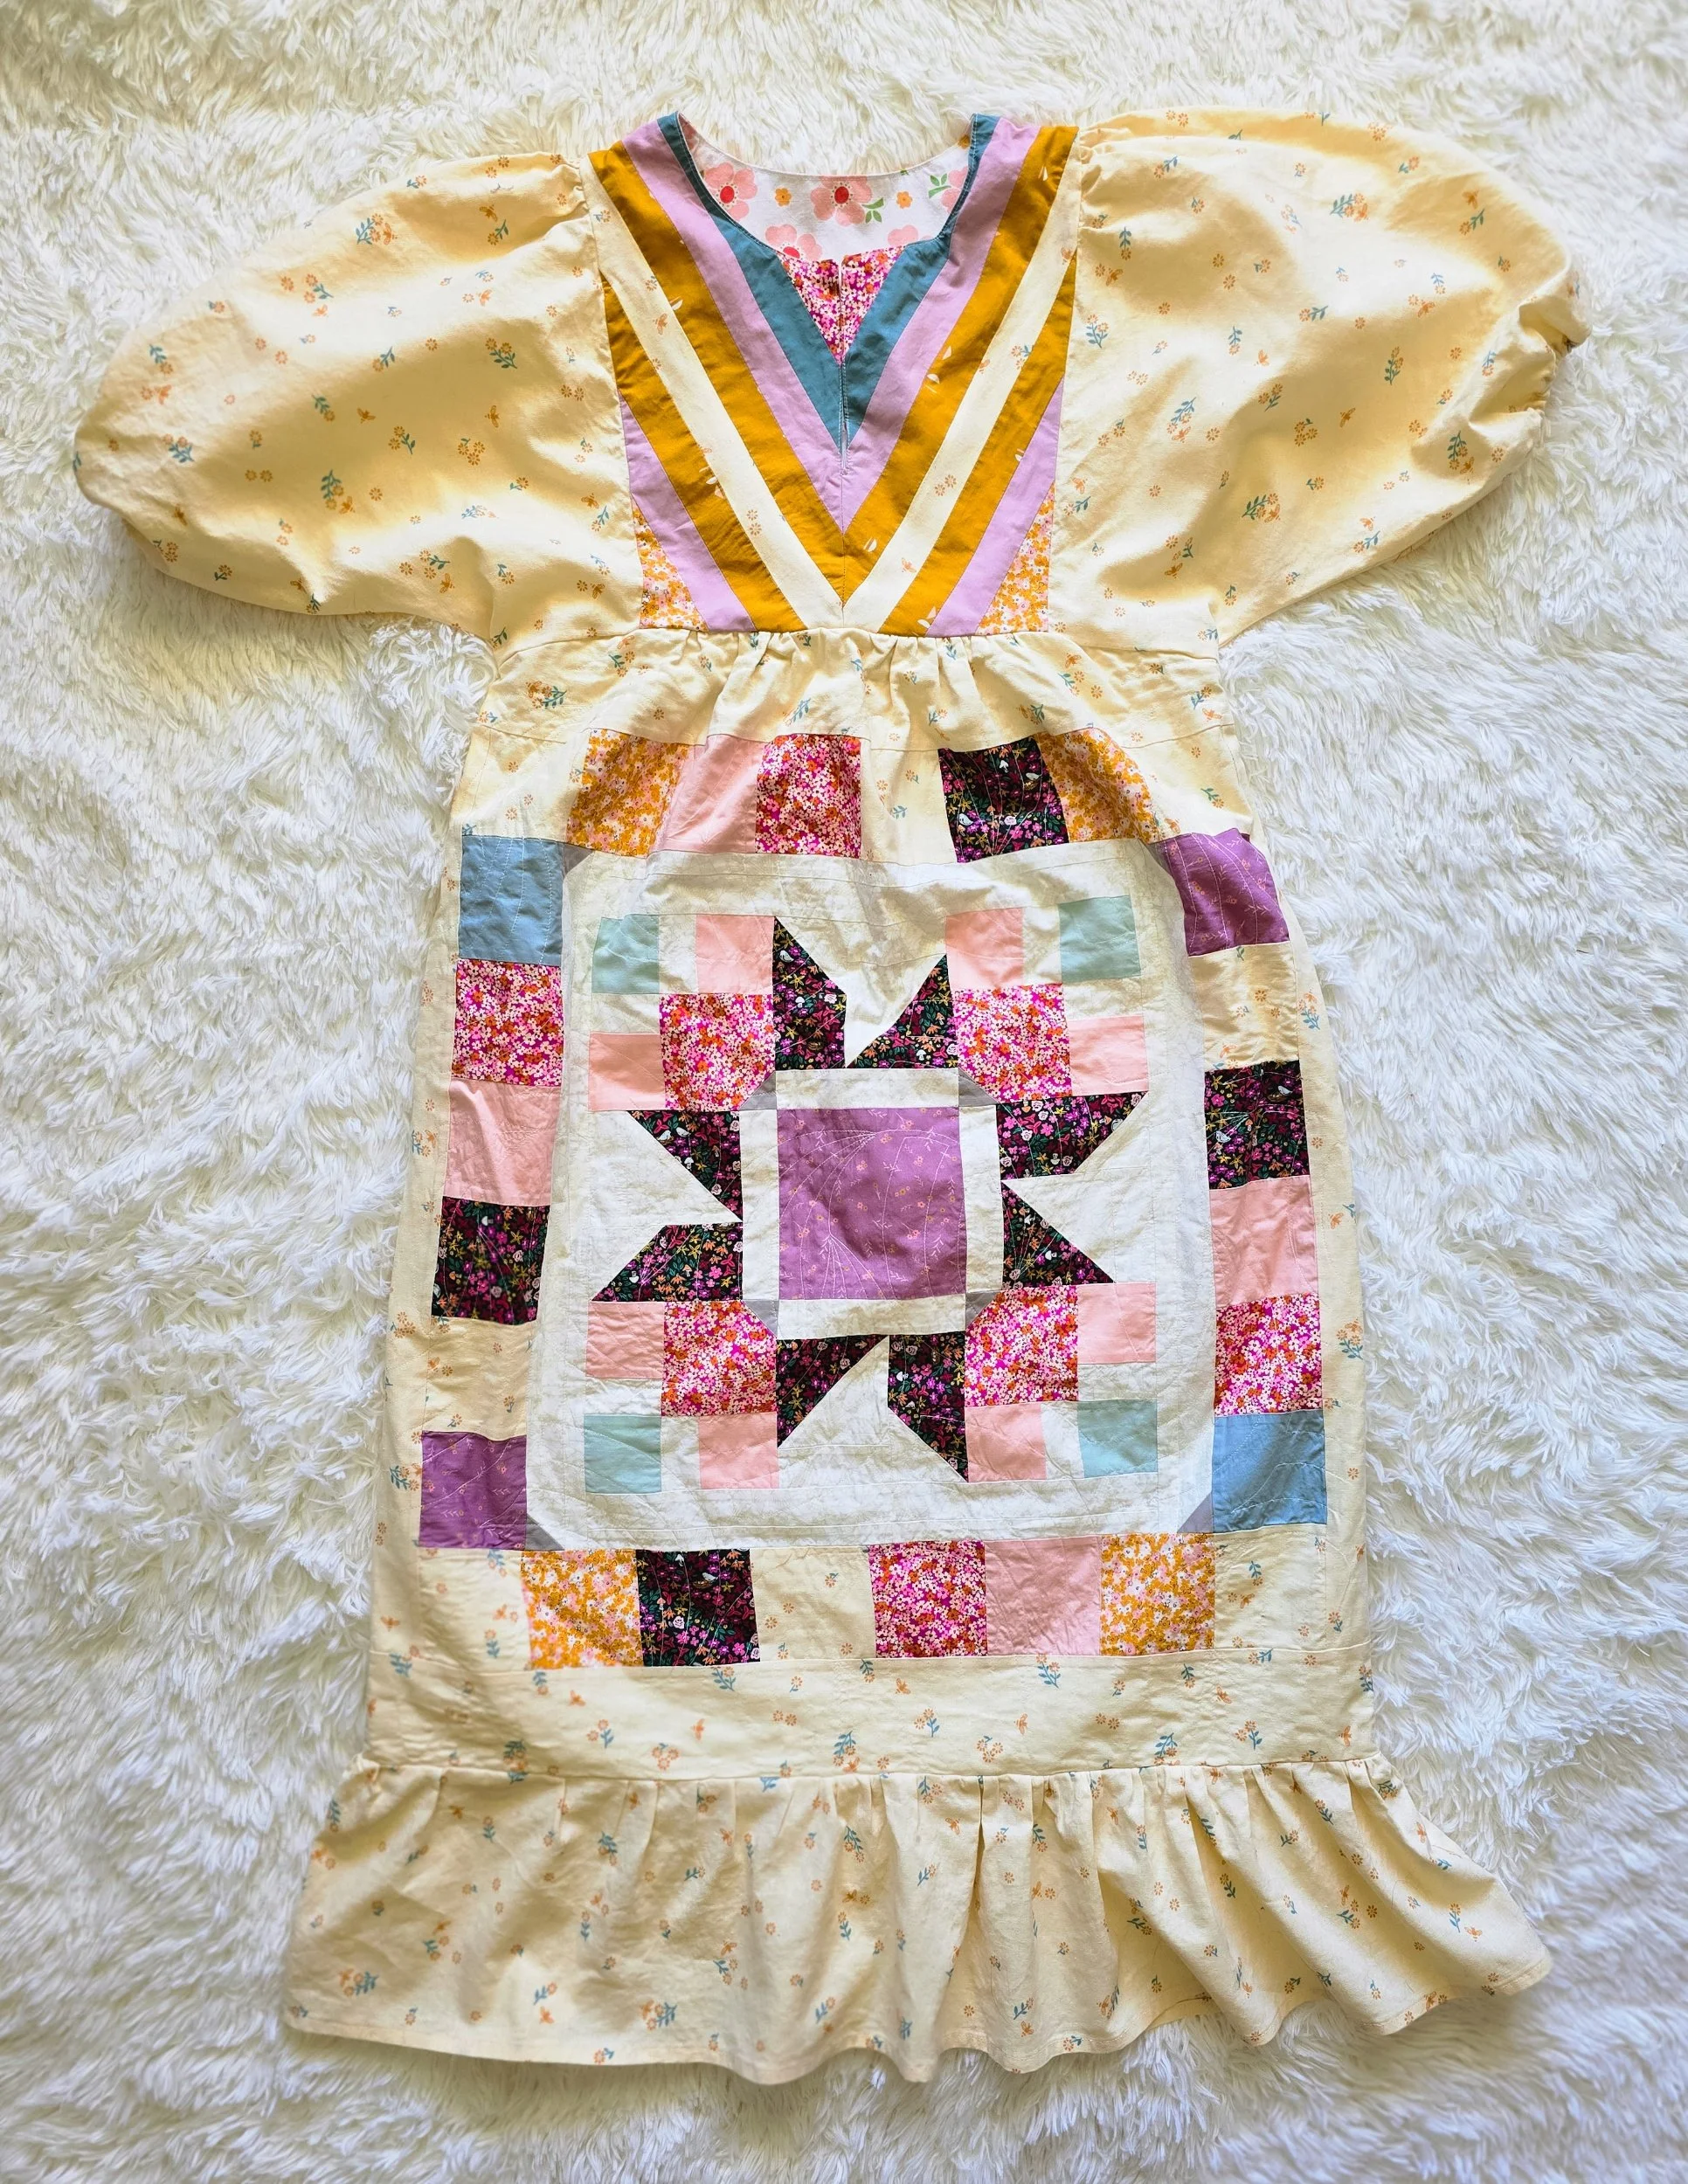
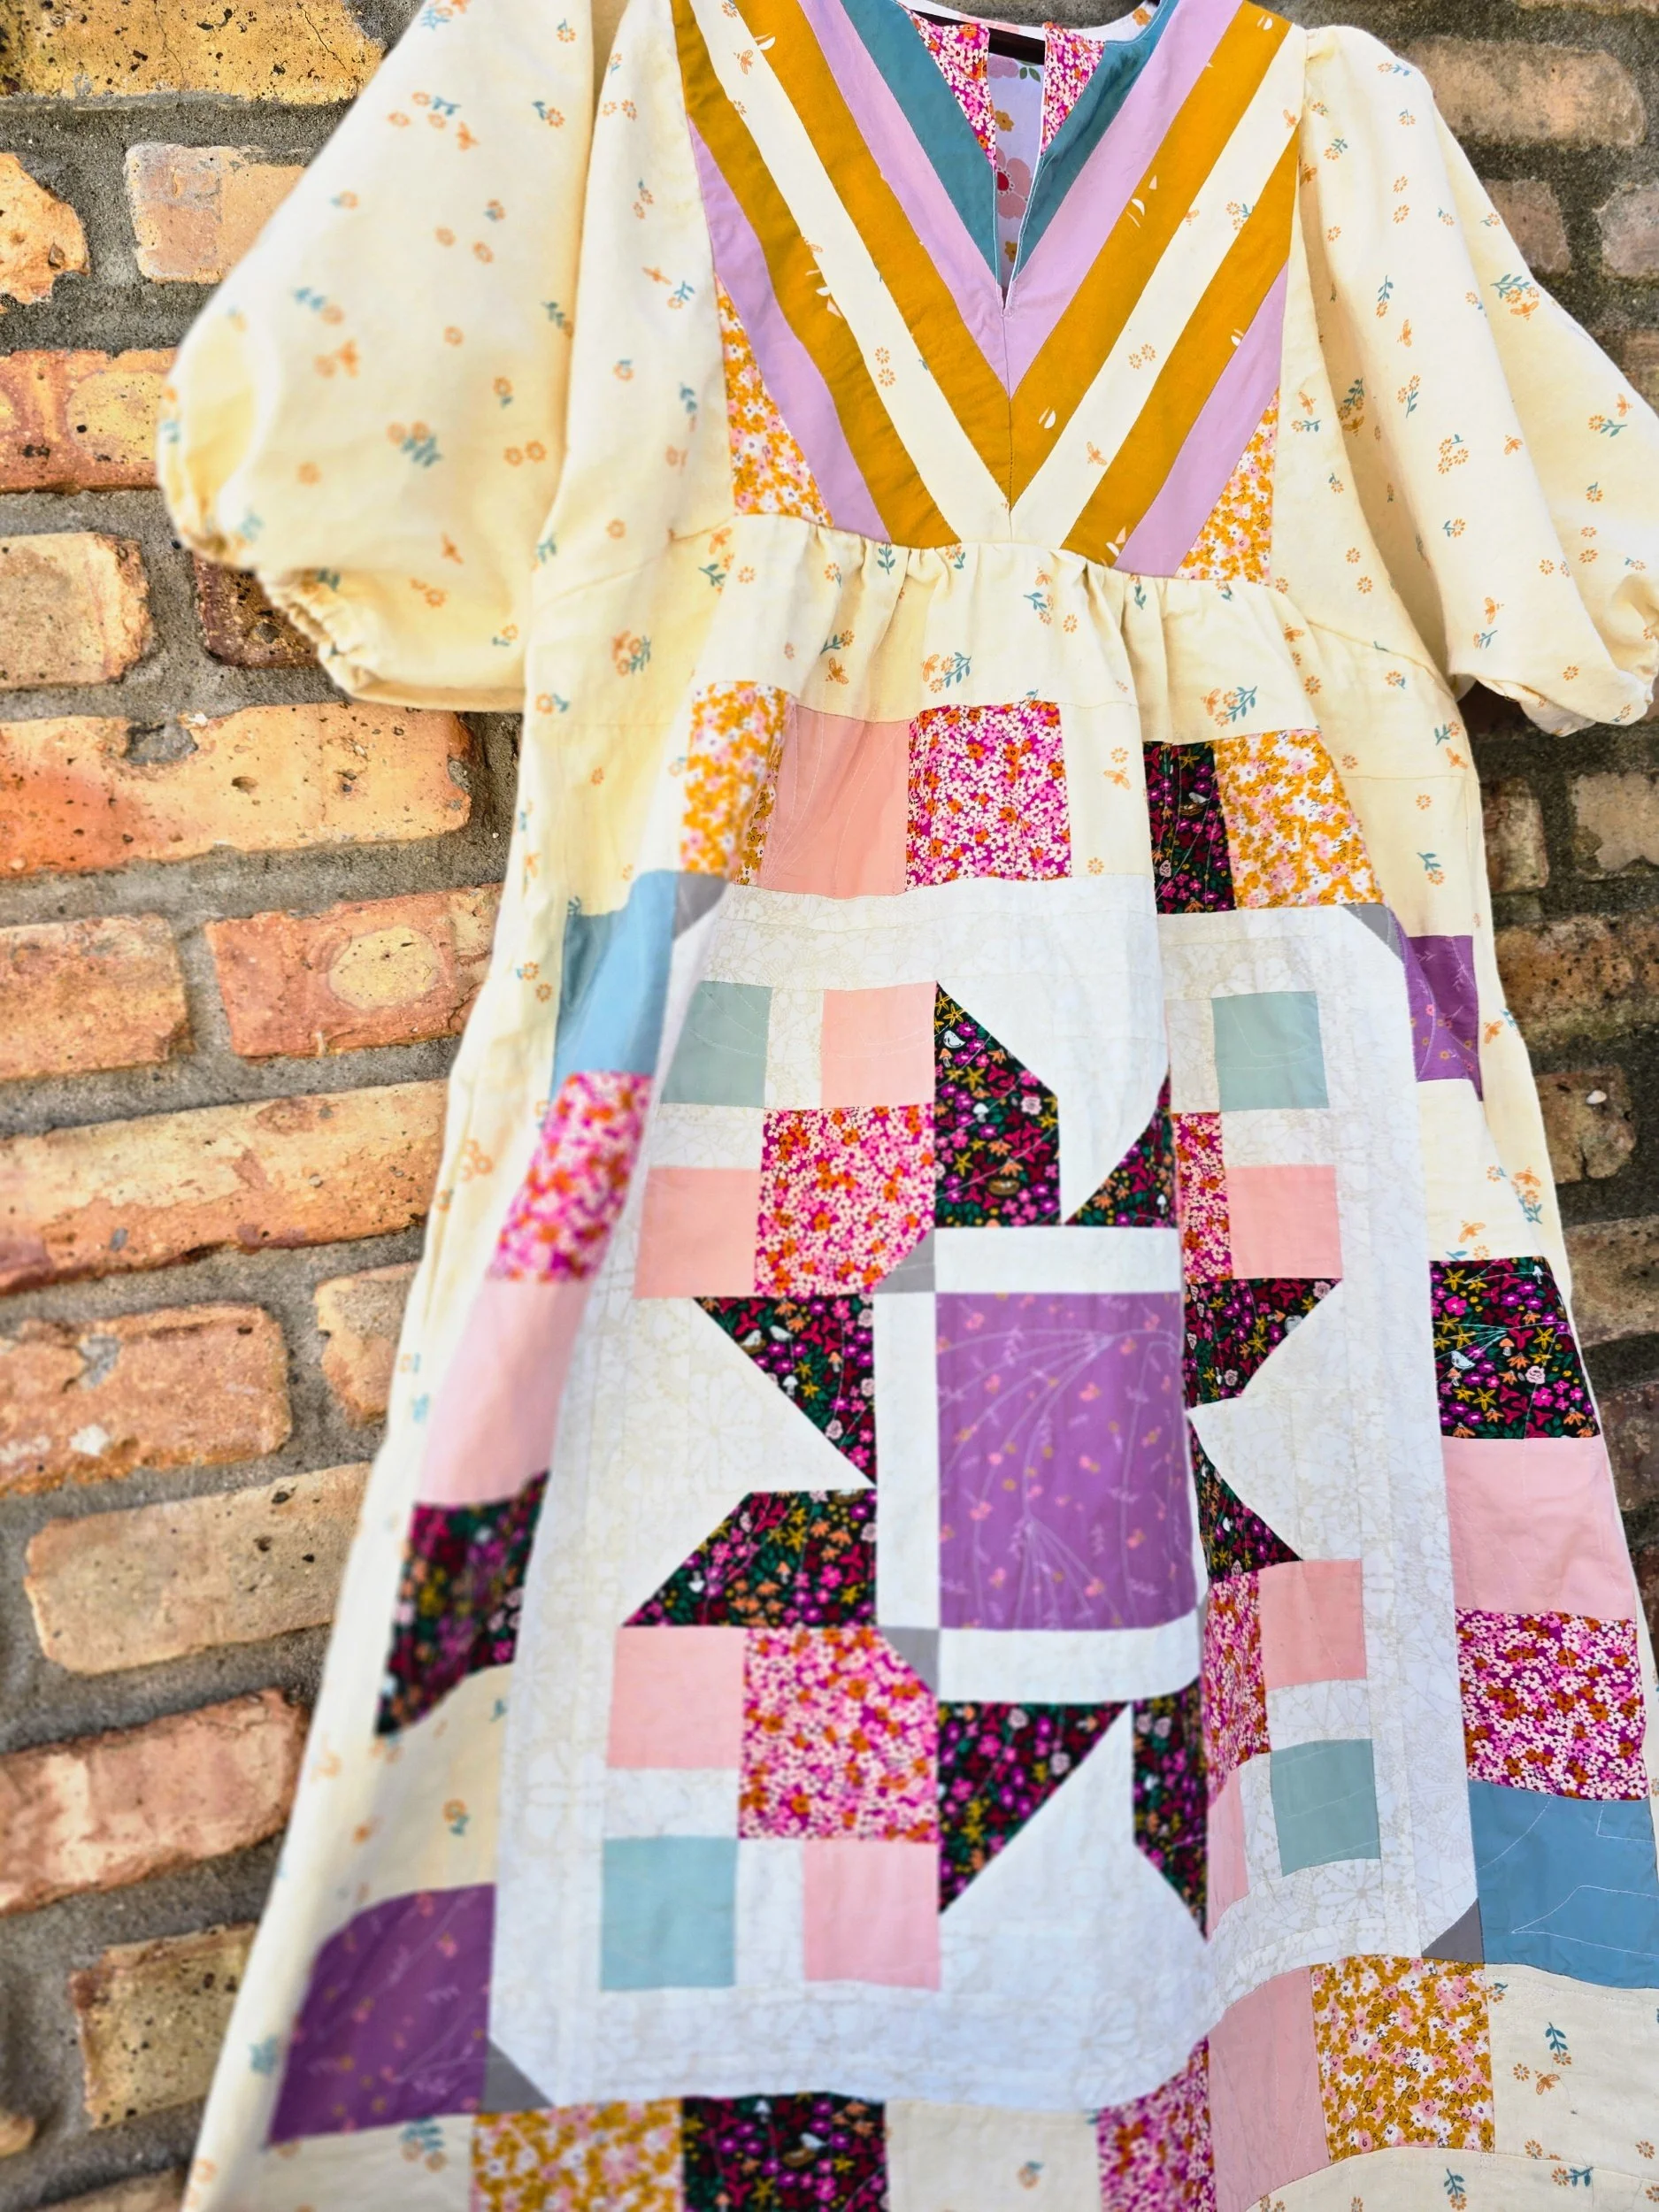
This time, a block I designed as a guest designer for April’s Sweet Potato Quilt Club ended up becoming a dress. The block is called Wayfinder, and while I was sewing my sample, I kept thinking how fun it would be to turn it into something wearable. With a few borders and a little experimenting, that one block became the center of a dress panel.
If you're curious about the club or want to join the fun, you can learn more about the Sweet Potato Quilt Club HERE.
Starting with the Wayfinder Block
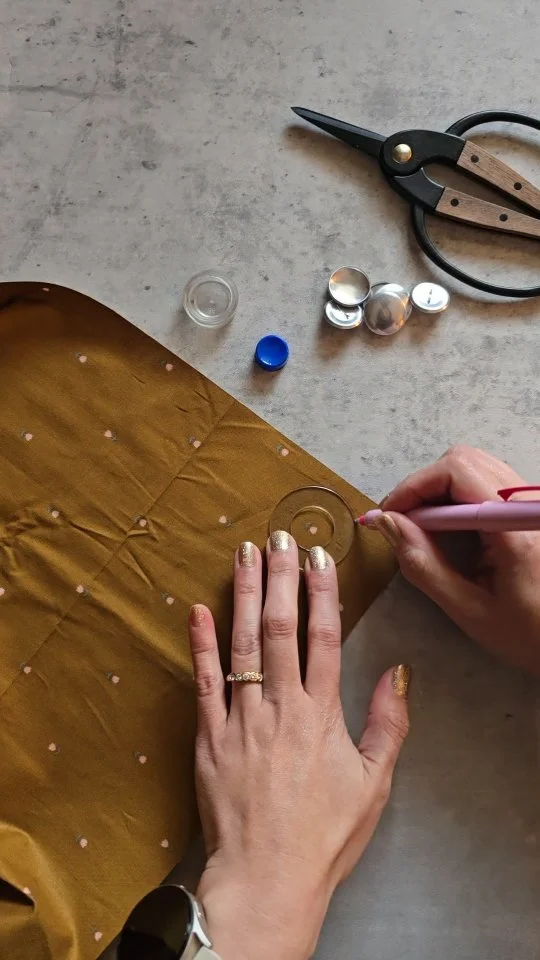
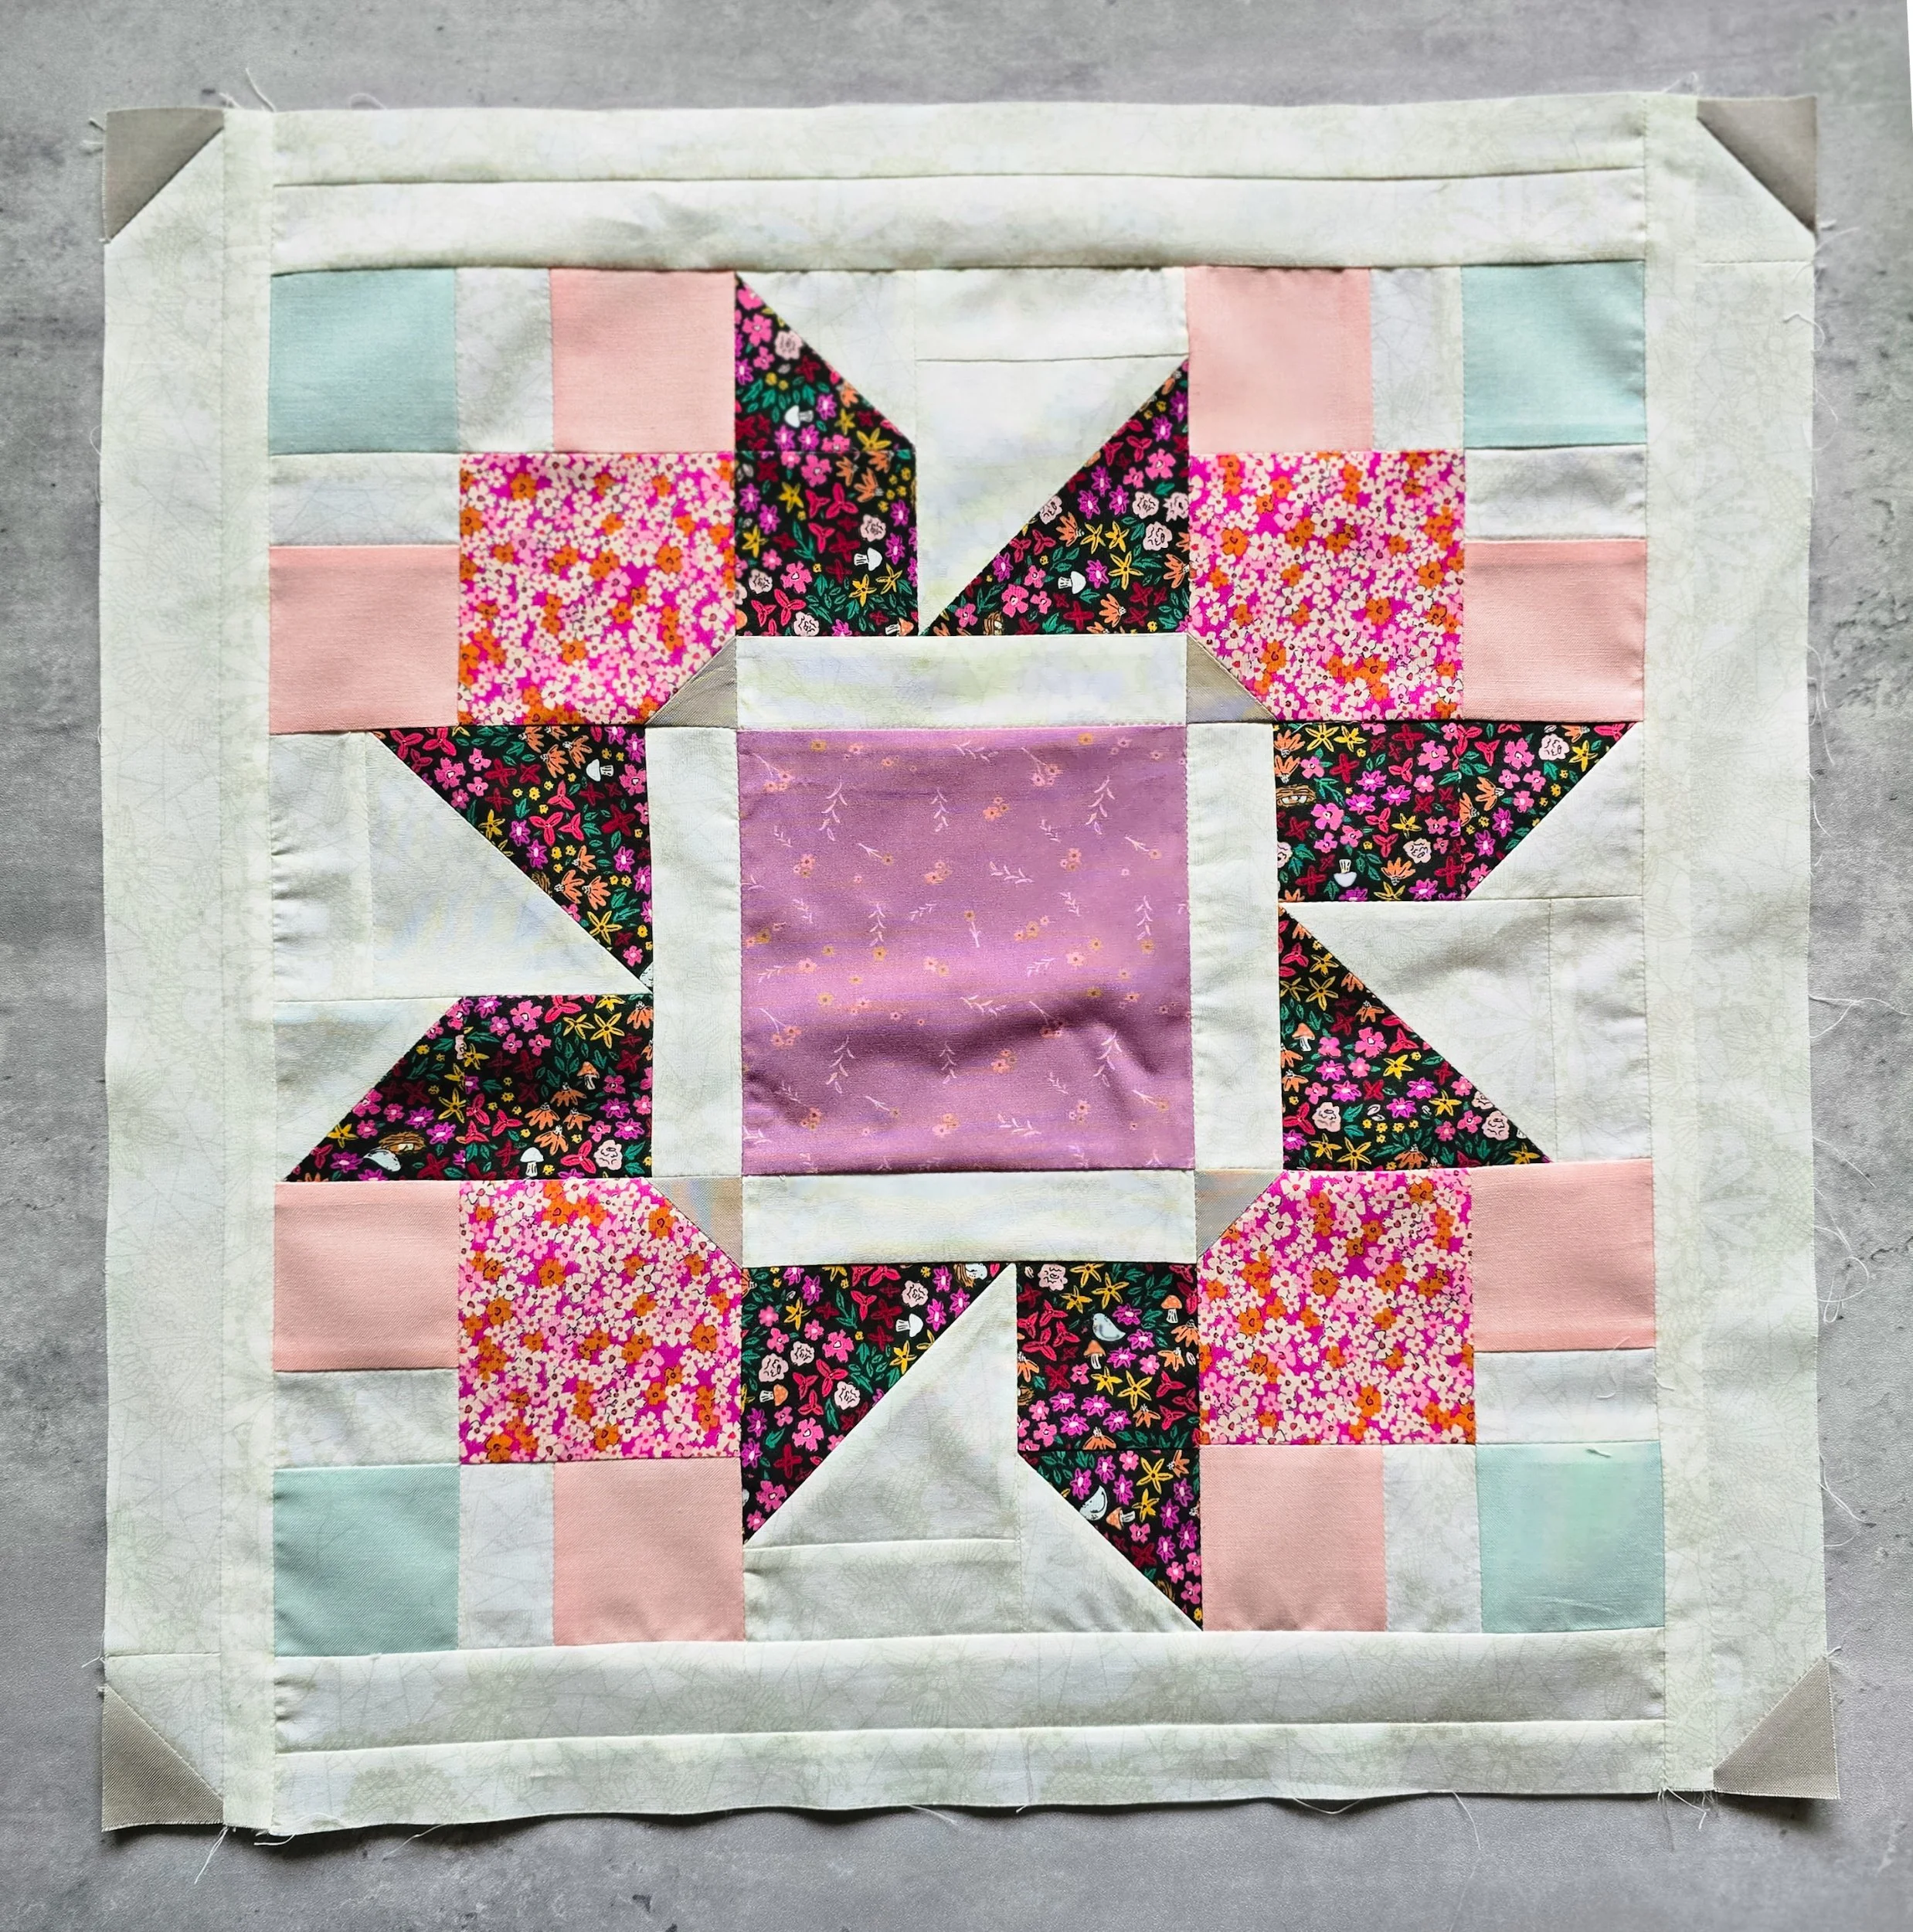
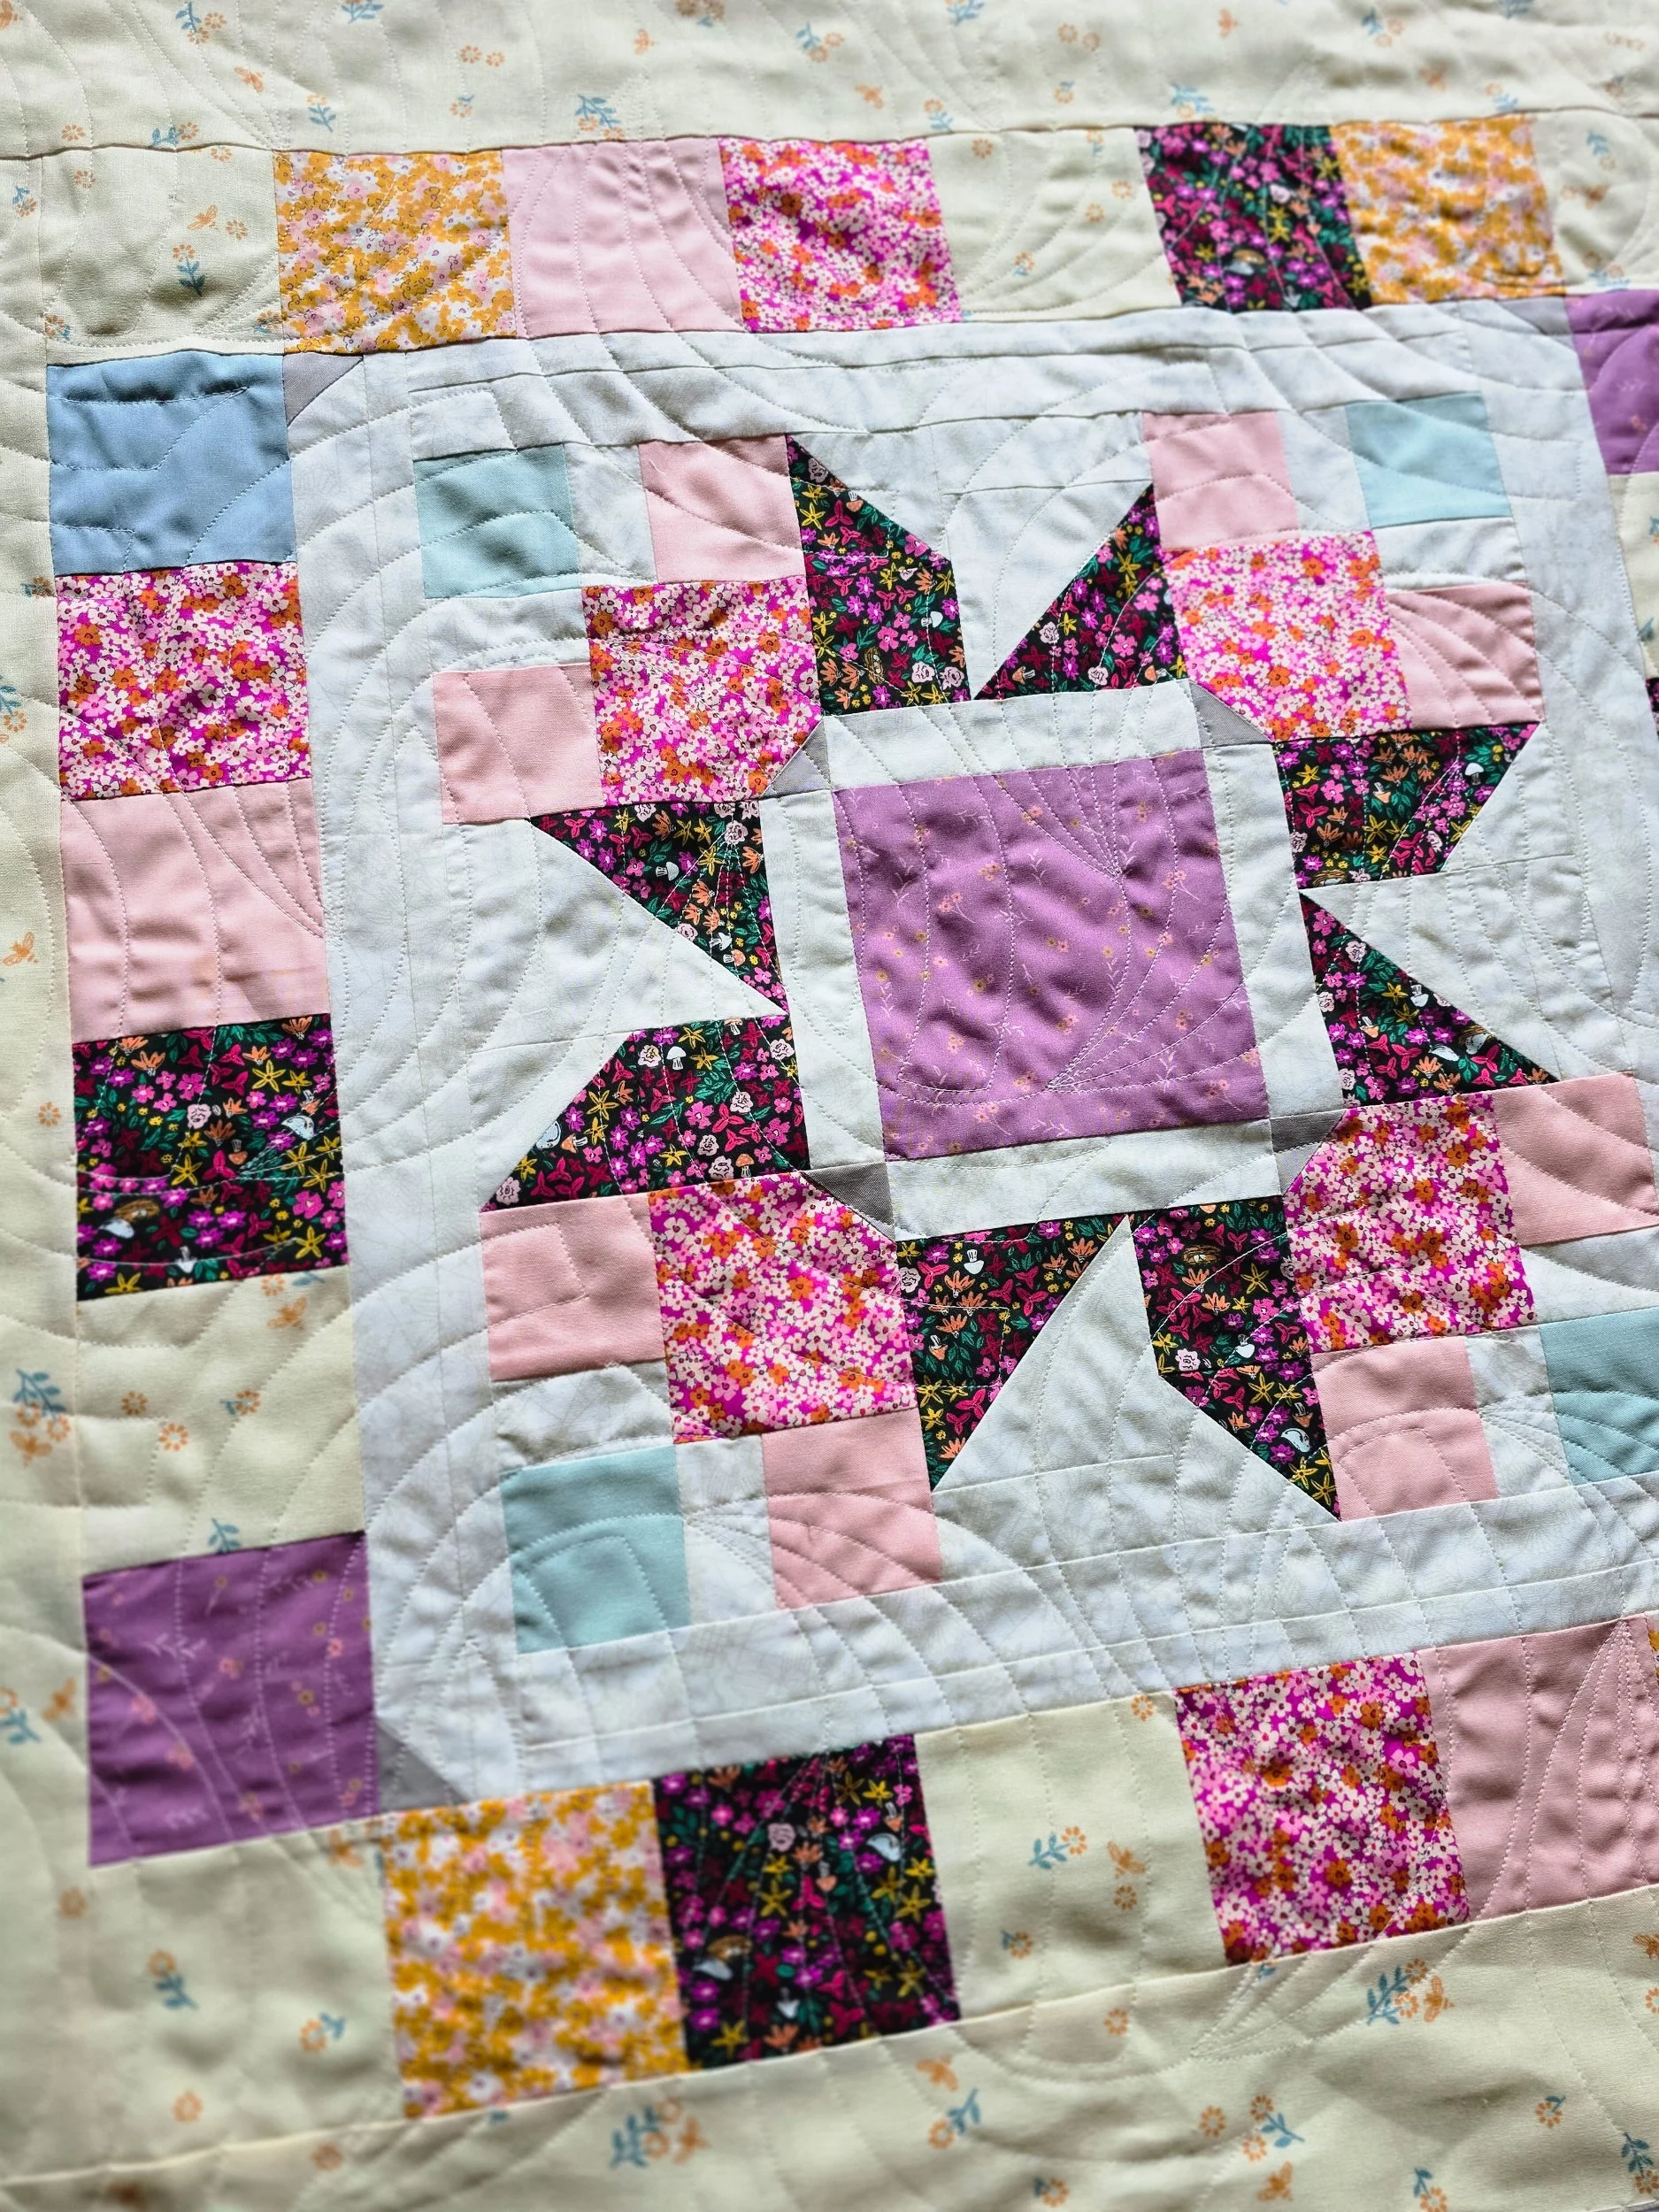
I began with the Wayfinder block from the April Sweet Potato Quilt Club. The block is 18" square, a nice size on its own, but to turn it into a dress panel, I wanted to make it a little larger.The first step was adding a scrappy frame around the block using (28) 3.5" squares. This is the perfect moment to dig into your scrap bin and mix prints that play nicely together.
For the scrappy border, you will need:
(6) 3.5" squares for each side border strip
(8) 3.5" squares for the top border strip
(8) 3.5" squares for the bottom border strip
Sew the squares together to create the four border strips, then attach them around the block to form the scrappy frame. I like to lay all the squares out first and move pieces around until the colors feel balanced. It’s a small detail, but it really helps the border feel cohesive while still keeping that scrappy charm.
Adding the Borders
Once the scrappy squares were in place, I added simple border strips to help bring the panel to the size I needed for the dress. You will need: (2) 3.5" x 24.5" side border strips and (2) 3.5" x 30.5" border strips for top and bottom. At this point, the quilt block starts to feel more like a panel rather than just a block, which makes it perfect for incorporating into a garment.
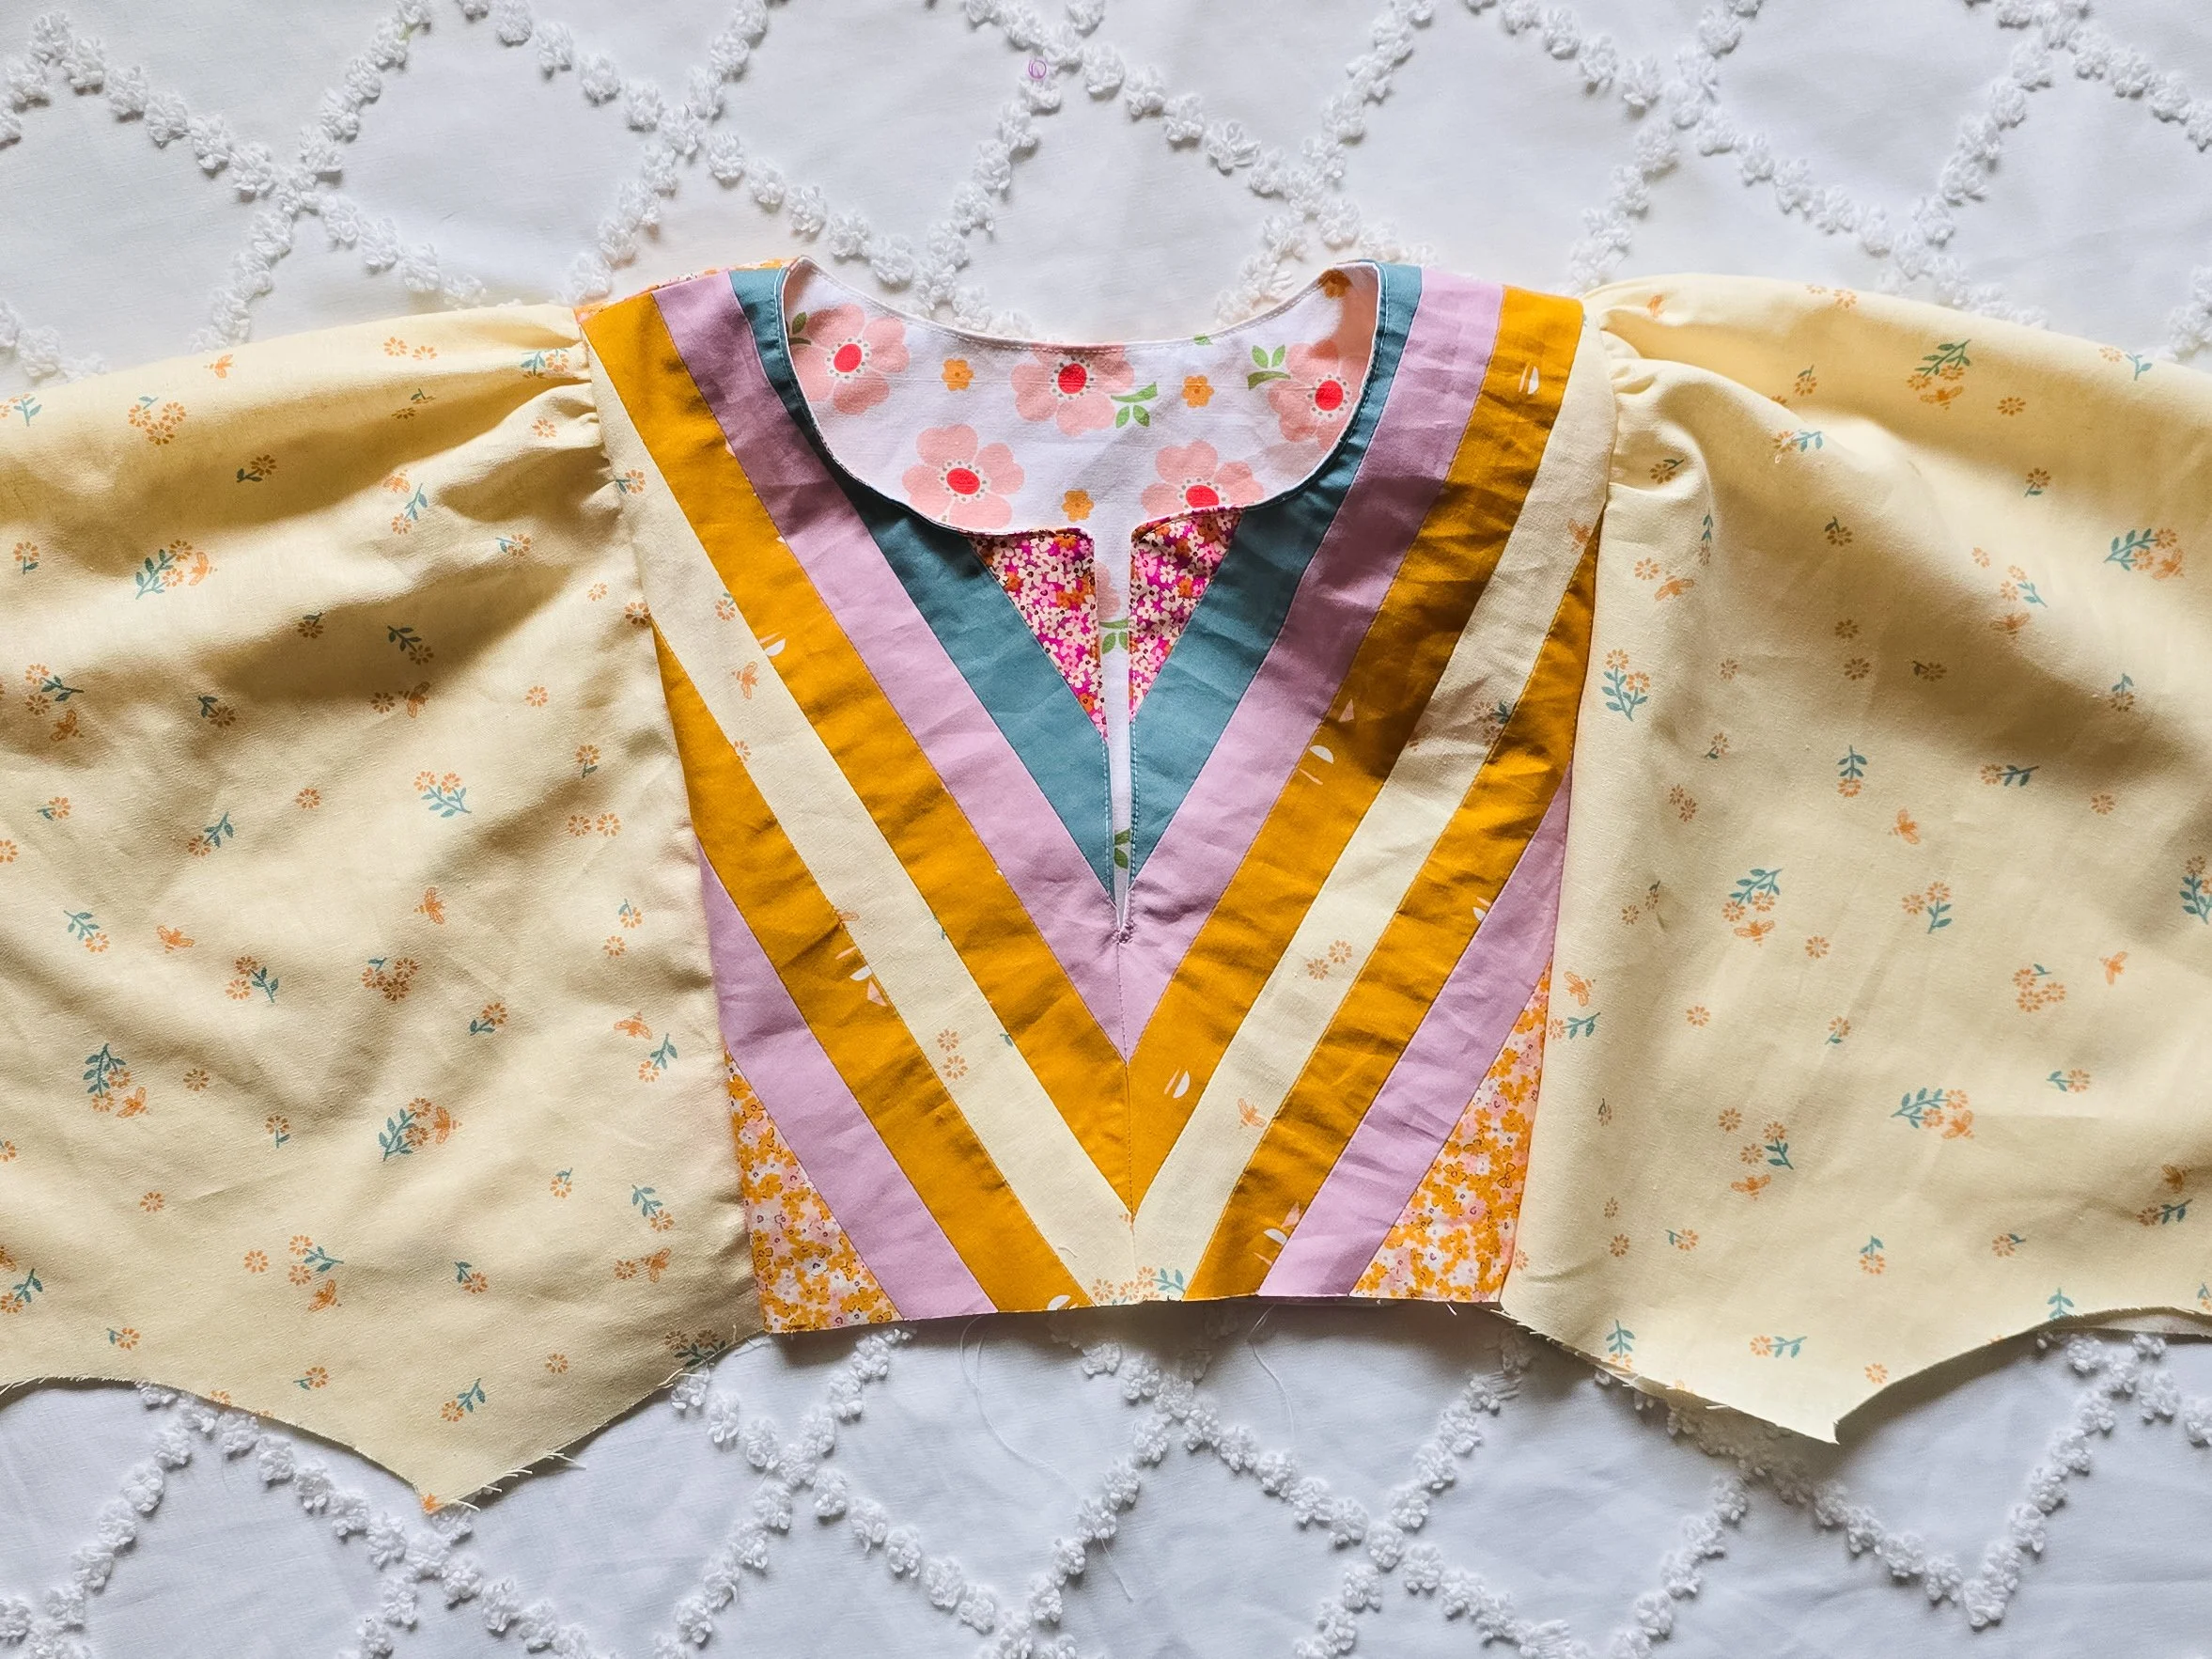
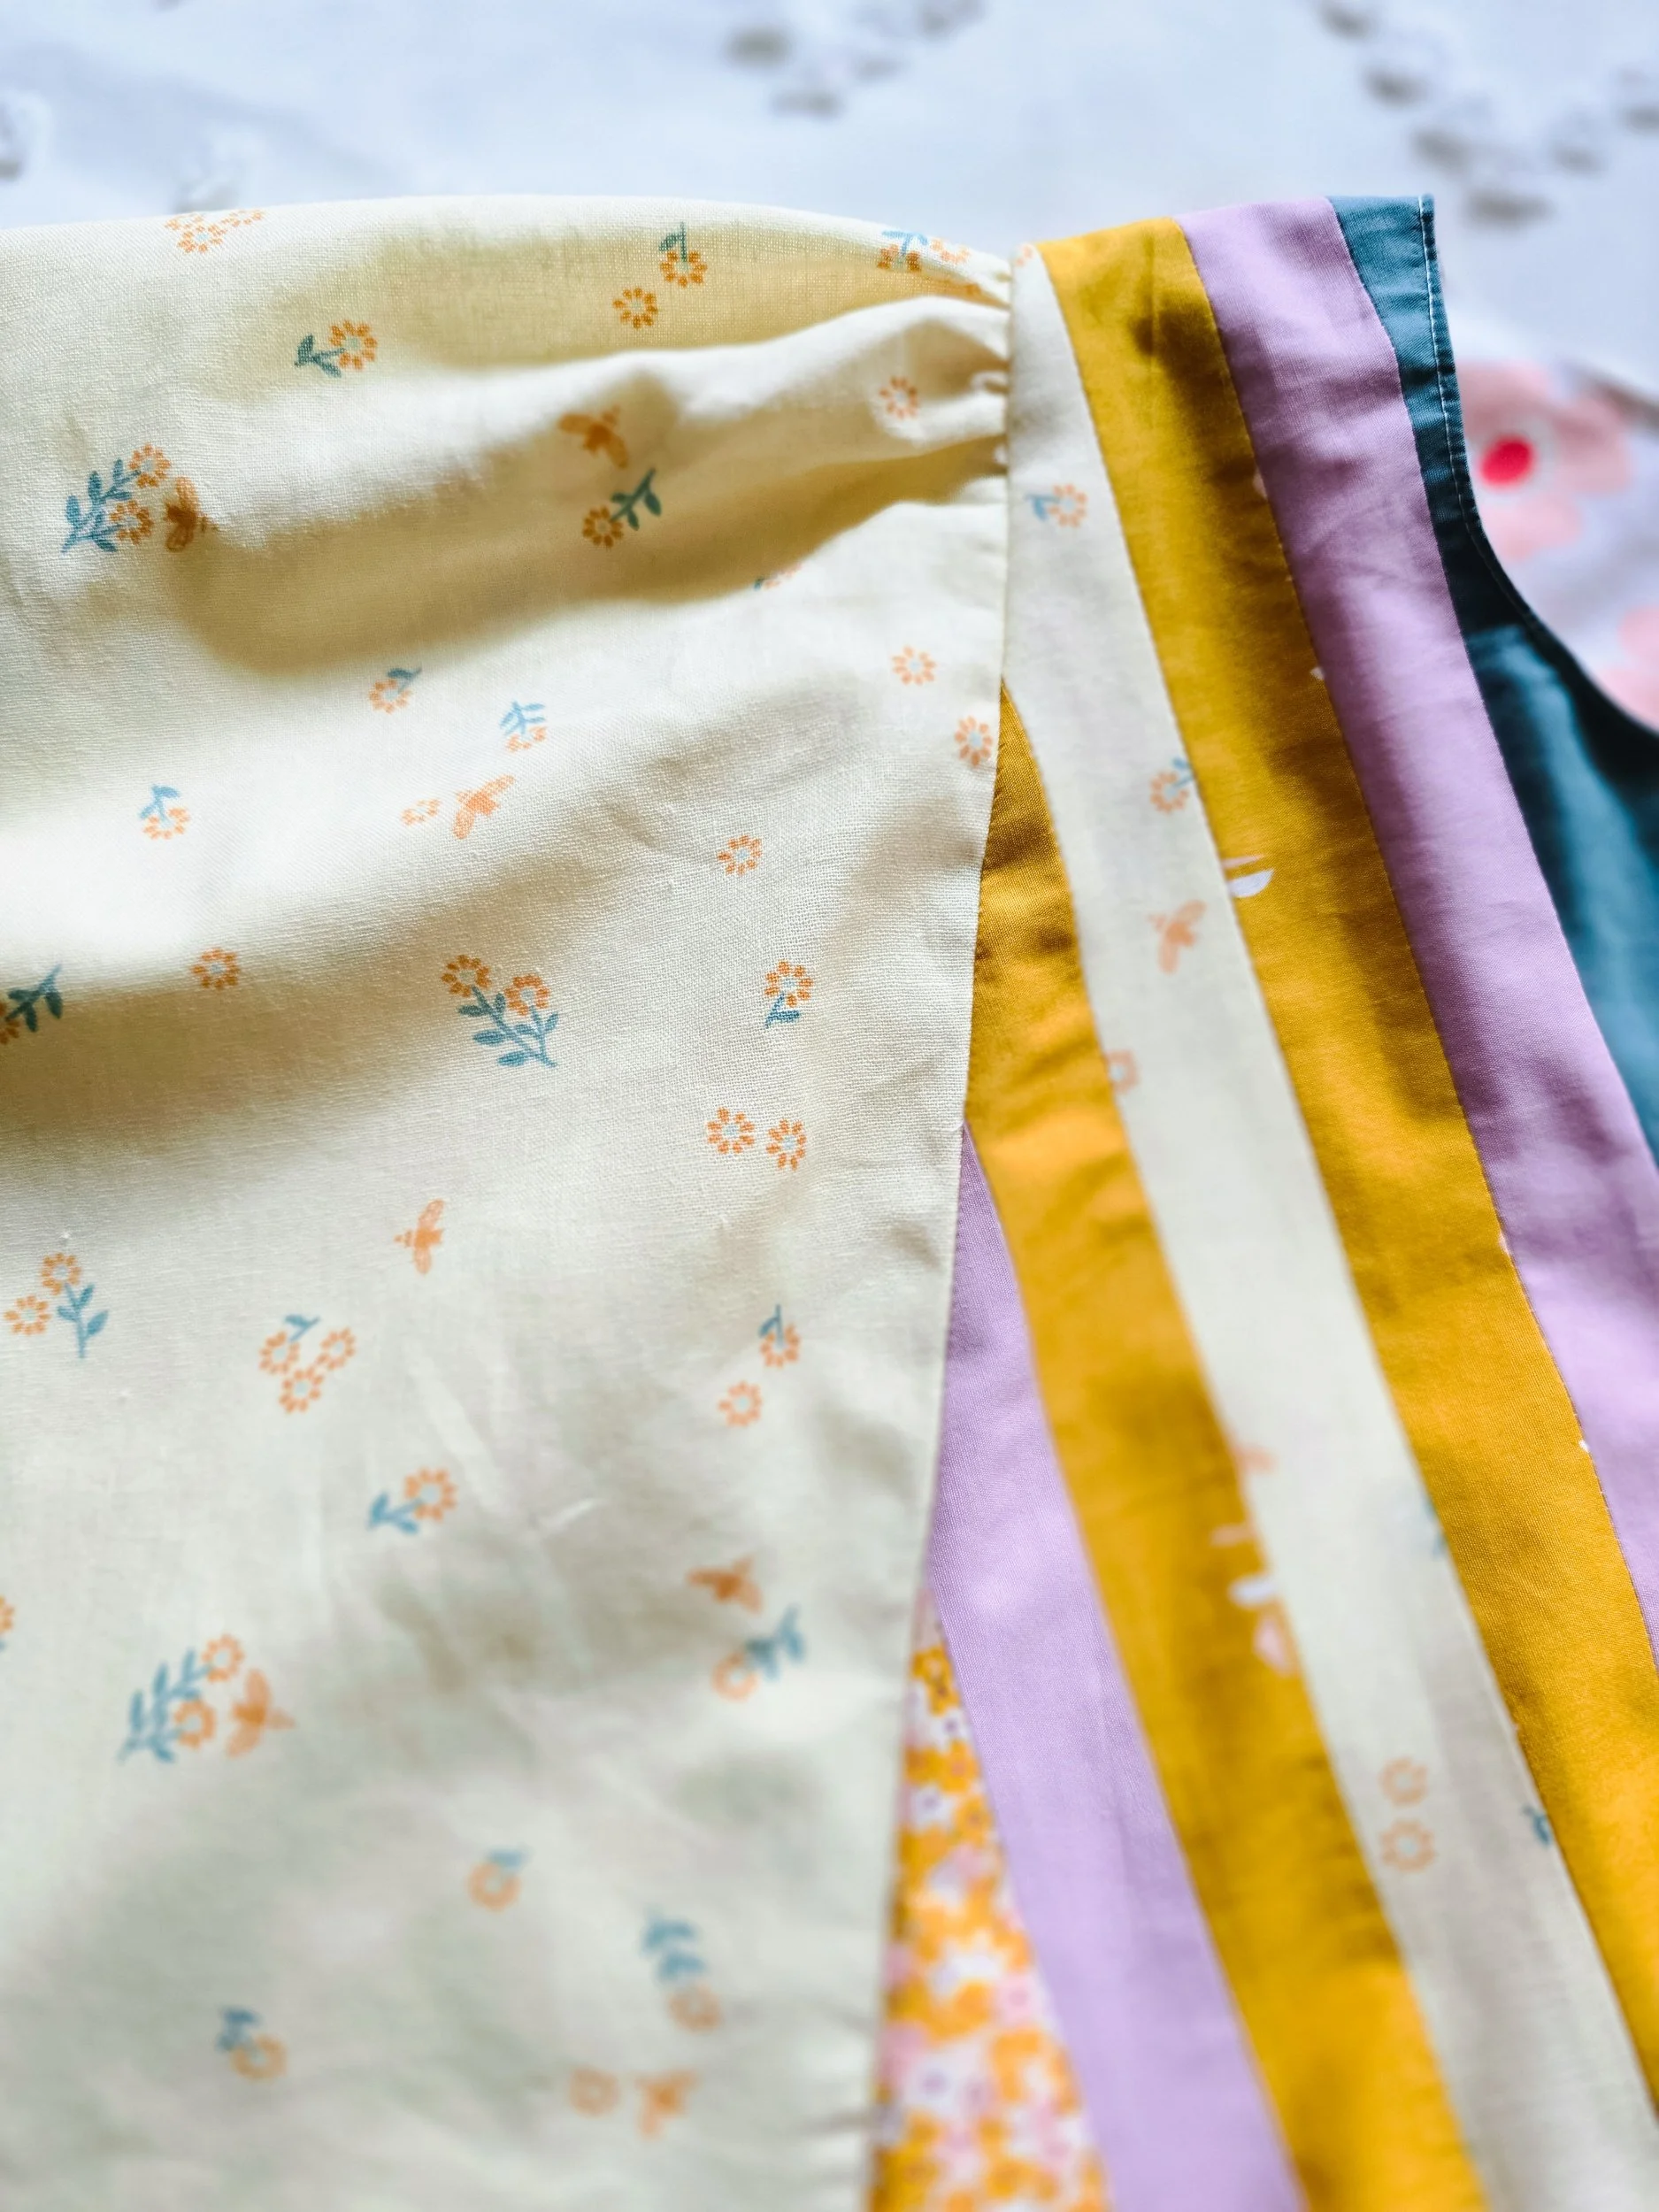
Because I was making a dress, I actually made two identical panels. One became the front of the dress and the other the back, which helps keep the design balanced and gives the dress that patchwork detail from both sides.
One thing I really love about this approach is how flexible it is. If you’re using a different dress pattern or want a slightly different fit, you can simply adjust the borders. Add wider strips, narrower strips, or even another round of patchwork until the panel reaches the size you need.
Turning the Panels Into a Dress
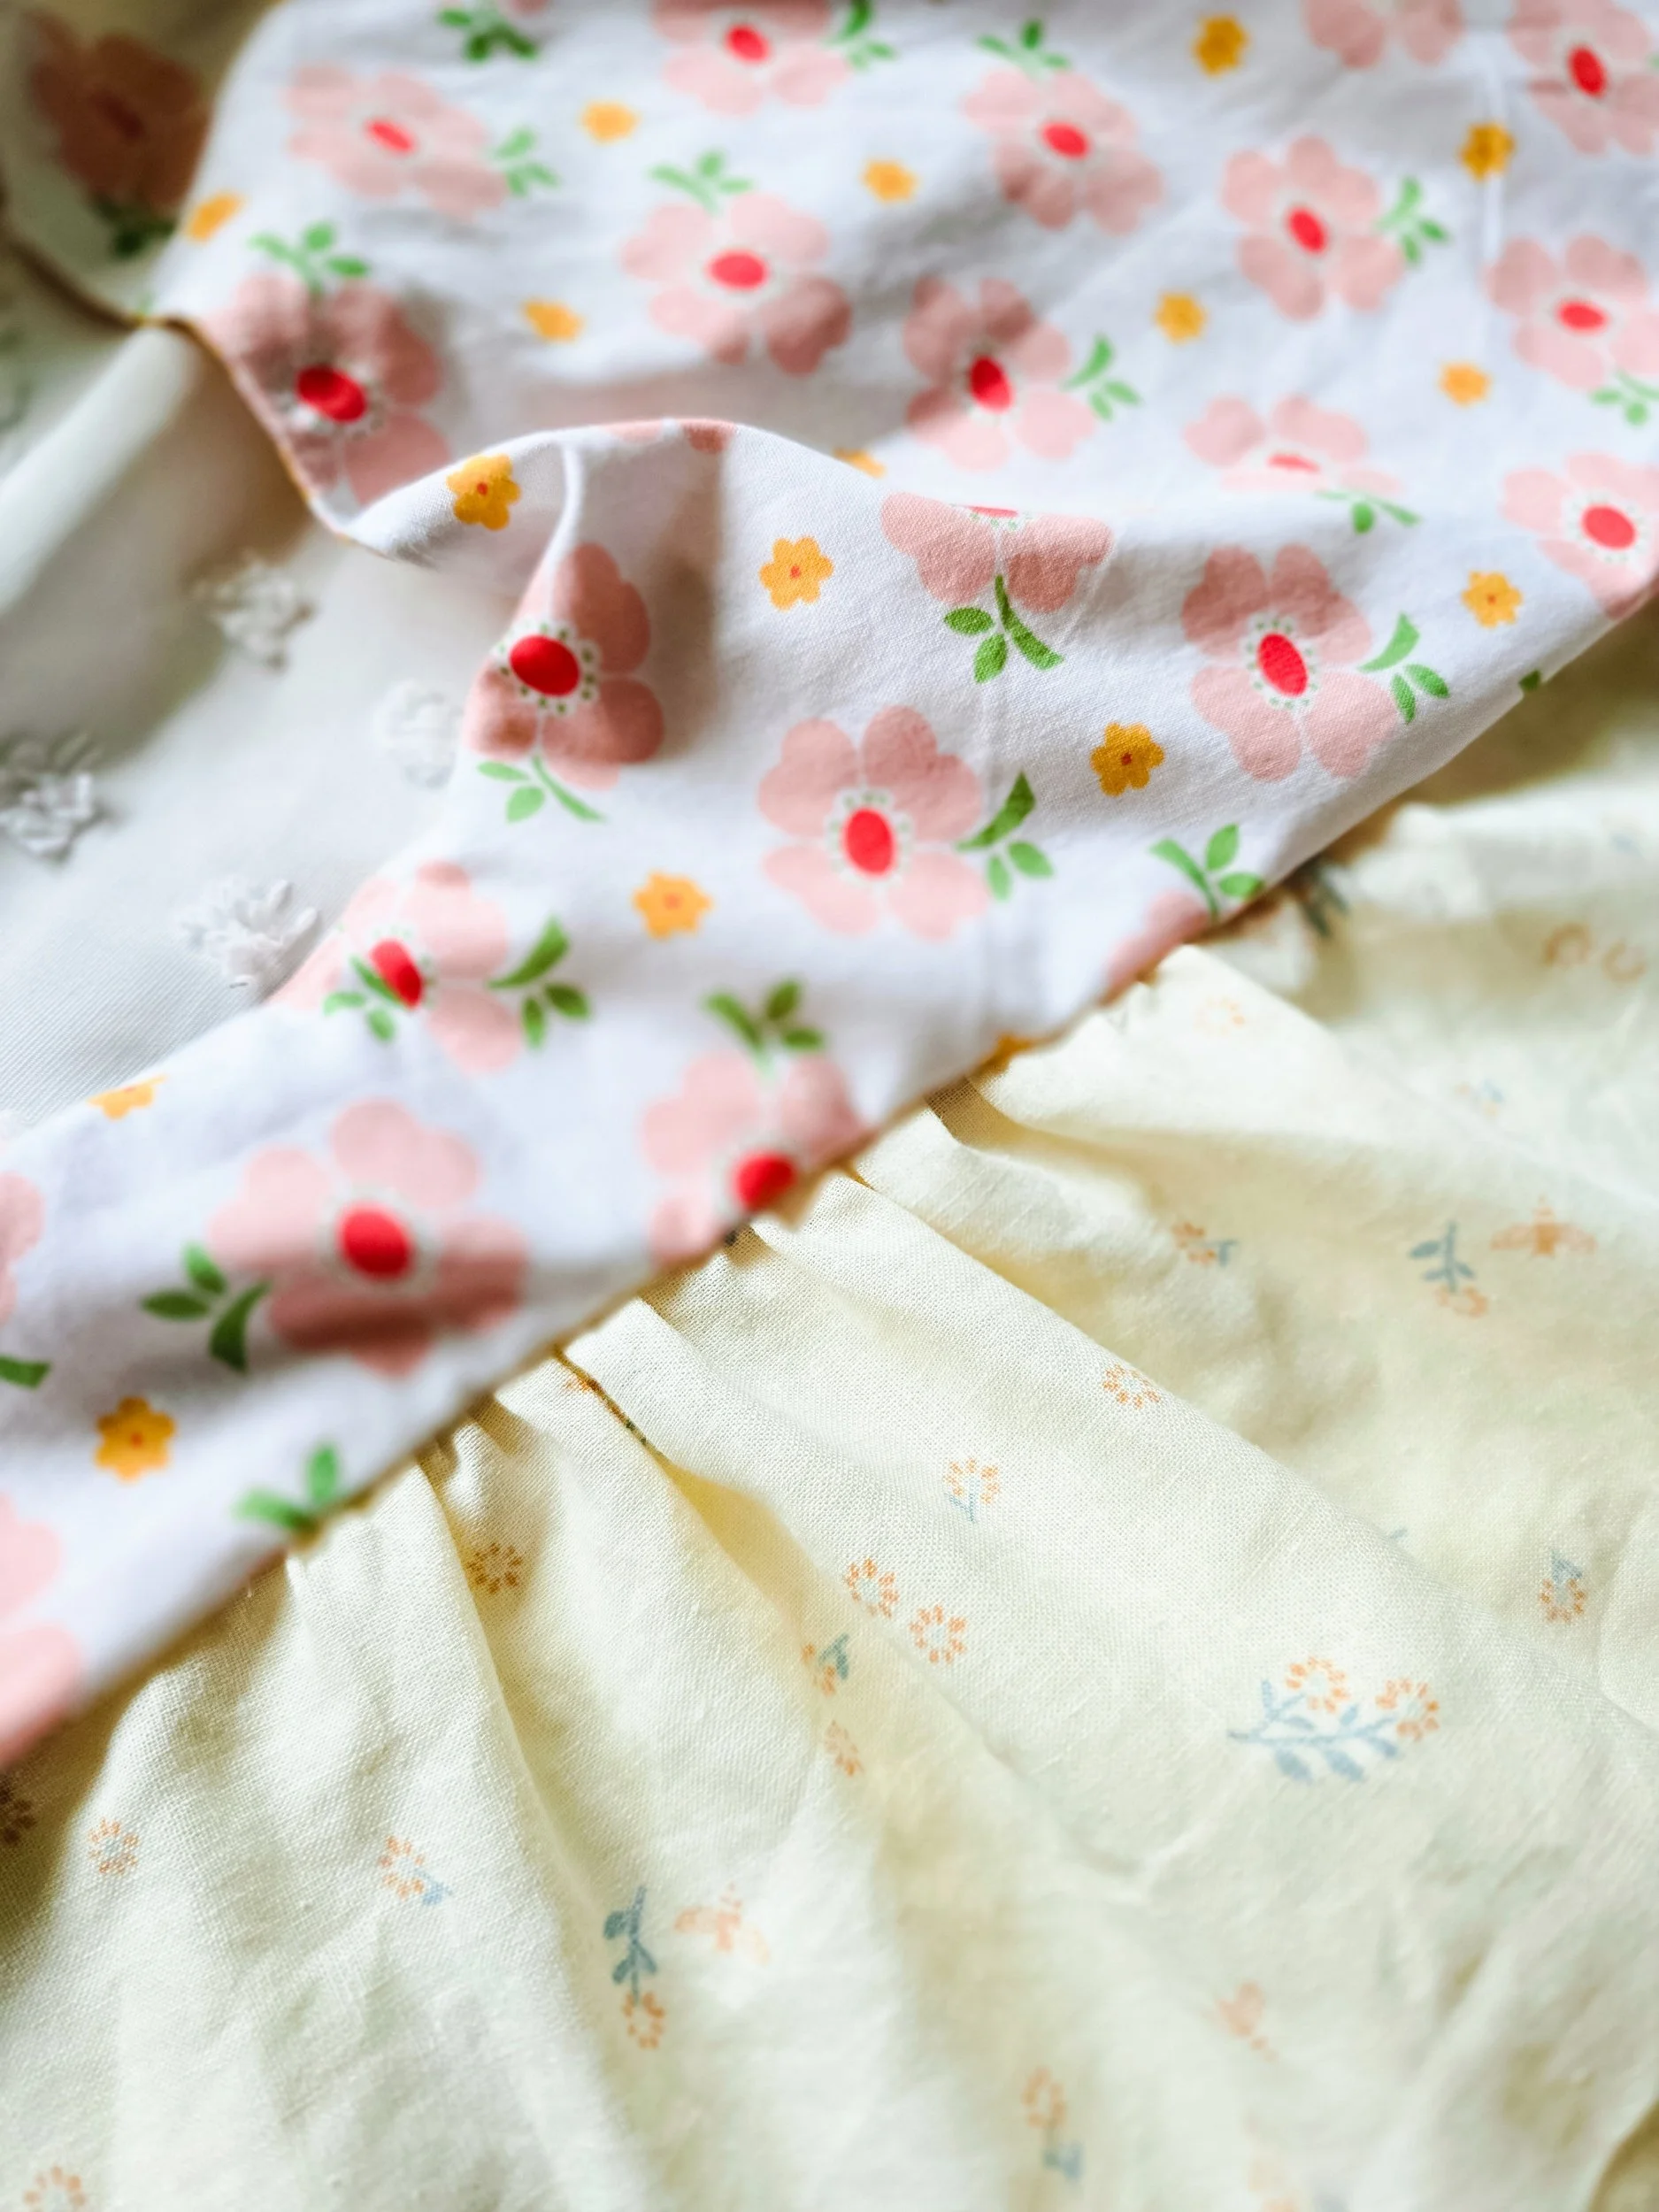
Once the two panels were finished, I used them as the front and back pieces of the dress and built the rest of the garment around them. The quilt panels become the focal point, while the side pieces help shape the dress and give it a comfortable fit. For the top portion, I kept things simple and added a fitted bodice with soft, puffy sleeves, which gives the dress a light, playful feel while letting the patchwork panels stay center stage.
It’s a fun way to blend quilting and garment sewing in one project.

A Little Fabric Magic
Quilt blocks don’t always have to stay in a quilt. Sometimes they become pillows, bags, or wall hangings… and sometimes they turn into something you can wear. There’s something really special about taking a block that started on the cutting table and giving it a completely different life. This one just happened to become a dress… and I have to say, it might be one of my favorite ways to wear patchwork.
Final Thoughts
If you ever make a quilt block you love and wonder what else it could become, try adding a few borders and see where it takes you. You might be surprised what a quilt block can turn into.
Happy Sewing!
You might also like…
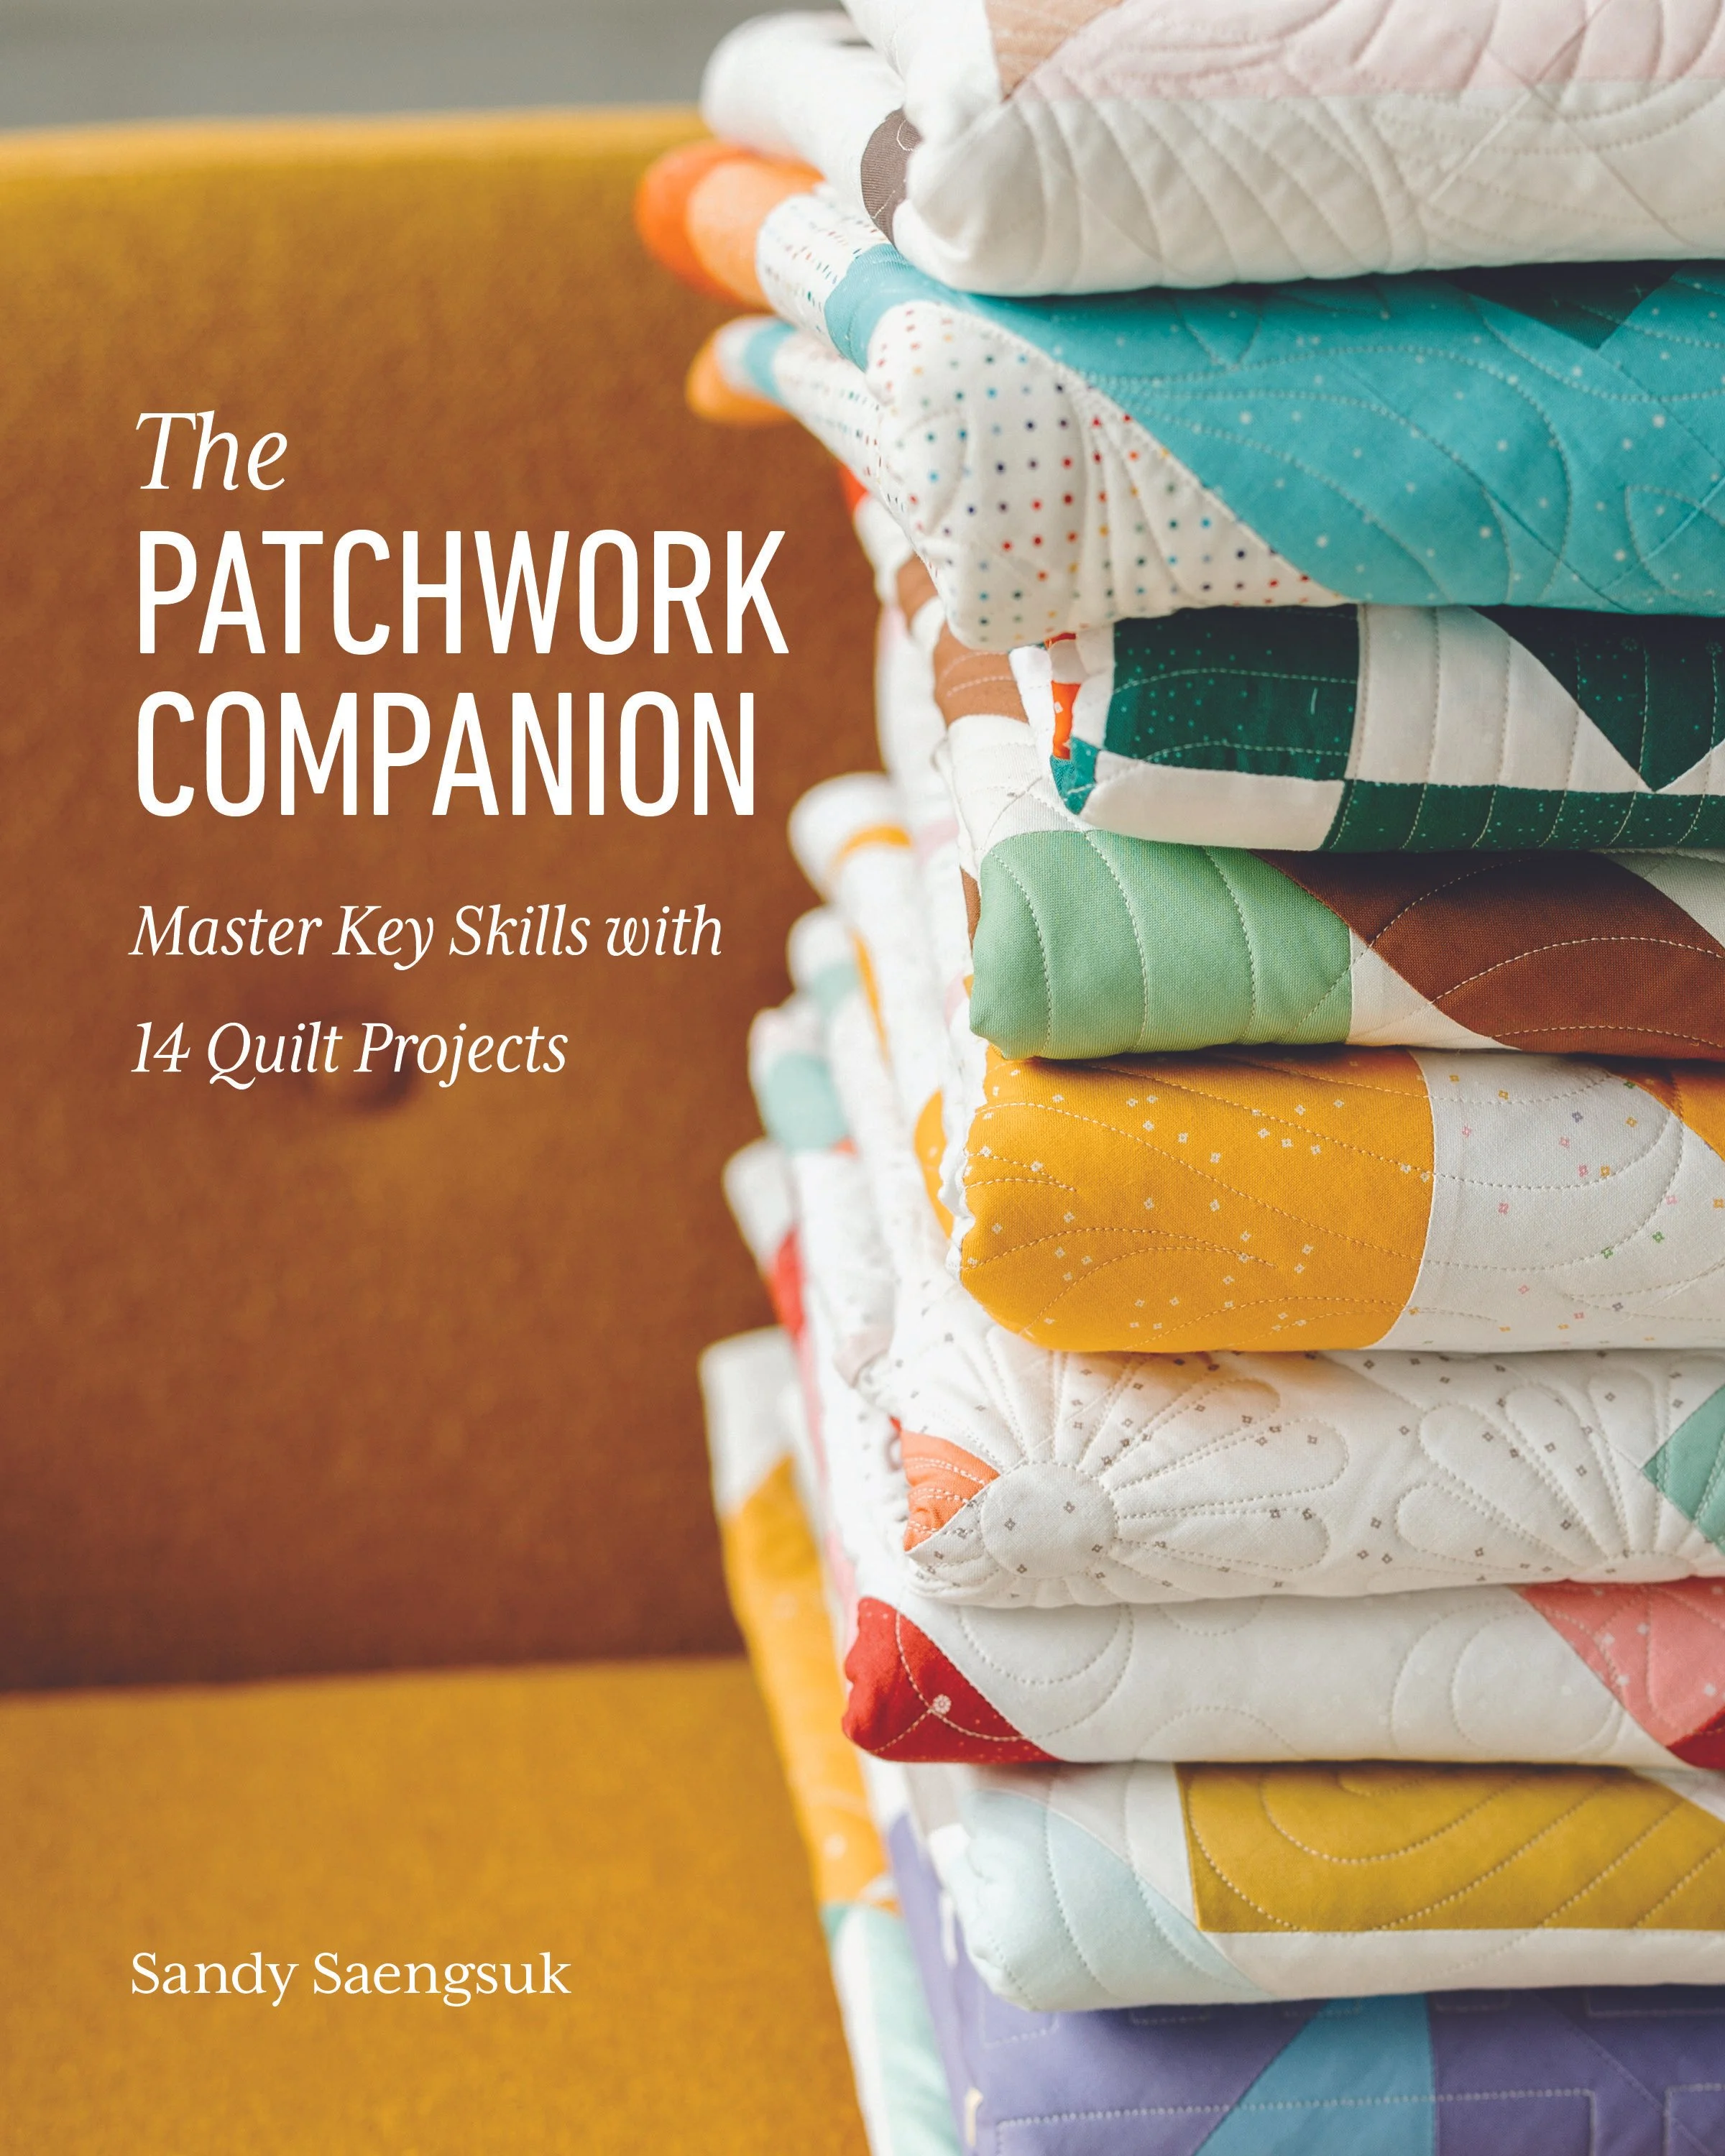
A practical, encouraging quilt book designed to build confidence through thoughtful patchwork.
Featuring 14 quilt projects created to support quilters at every stage.
Shipping Now
Good to know
All orders placed through this site will receive an author-signed copy
Books ship separately from patterns and other products. Please purchase books in a separate transaction to ensure accurate shipping. Thank you!
The Patchwork Companion is designed to grow with you, focusing on strong foundations, thoughtful process, and confident decision-making at your machine. Whether you’re new to quilting, self-taught, or looking to strengthen your fundamentals, this book meets you where you are and supports you as you build confidence.
What You’ll Find Inside
Inside The Patchwork Companion, you’ll find:
14 thoughtfully designed quilt projects that help strengthen core skills
Clear, easy-to-follow instructions with diagrams that support real understanding
Foundational techniques explained in a practical, approachable way
Projects that feel cozy, intentional, and useful for everyday life
Tips learned through hands-on quilting and teaching
Each project is designed to give you tools you can carry into future quilts.
A Note From Me
I became the first quilter in my family during a season when slowing down and making things by hand mattered more than ever. I learned quilting through trial, error, and a lot of seam ripping, and I wrote this book with that experience in mind.
My hope is that this book feels like sitting down to sew with a friend who understands the process and the learning curve.
Ready to Quilt Along?
If this feels like the kind of quilting book you’ve been looking for, I’d love for it to be part of your sewing space.

This listing is for PDF Pattern (NO Physical item will be sent).
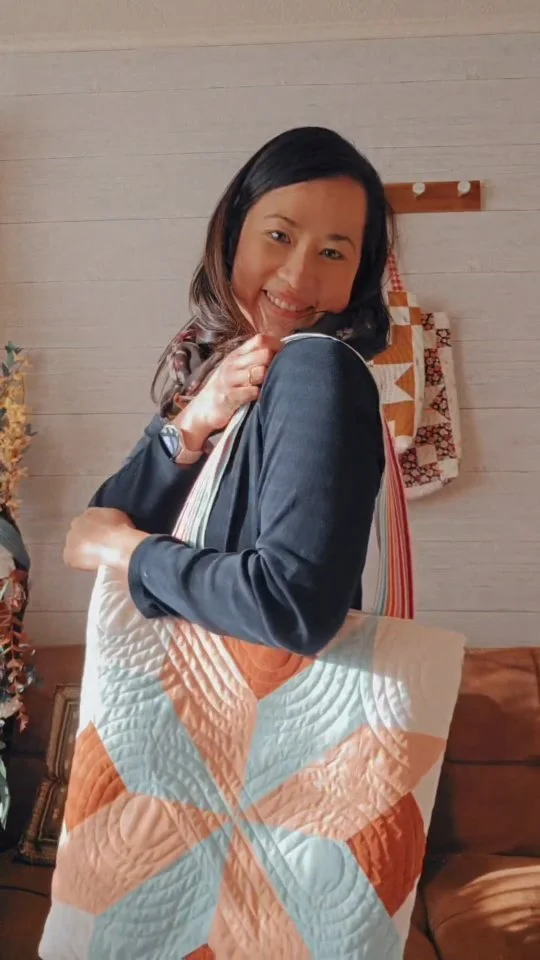
Size: 19" wide x 30" tall x 5" deep
Fabric requirements:
BG: 1 FQ
Accent: 1 FQ
Back panel: 2/3 yard
Lining: 2/3 yard
Handles: 3/8 yard
Happy Quilting!
What’s happening on the ‘Gram …